Using The Orders Tab
Overview
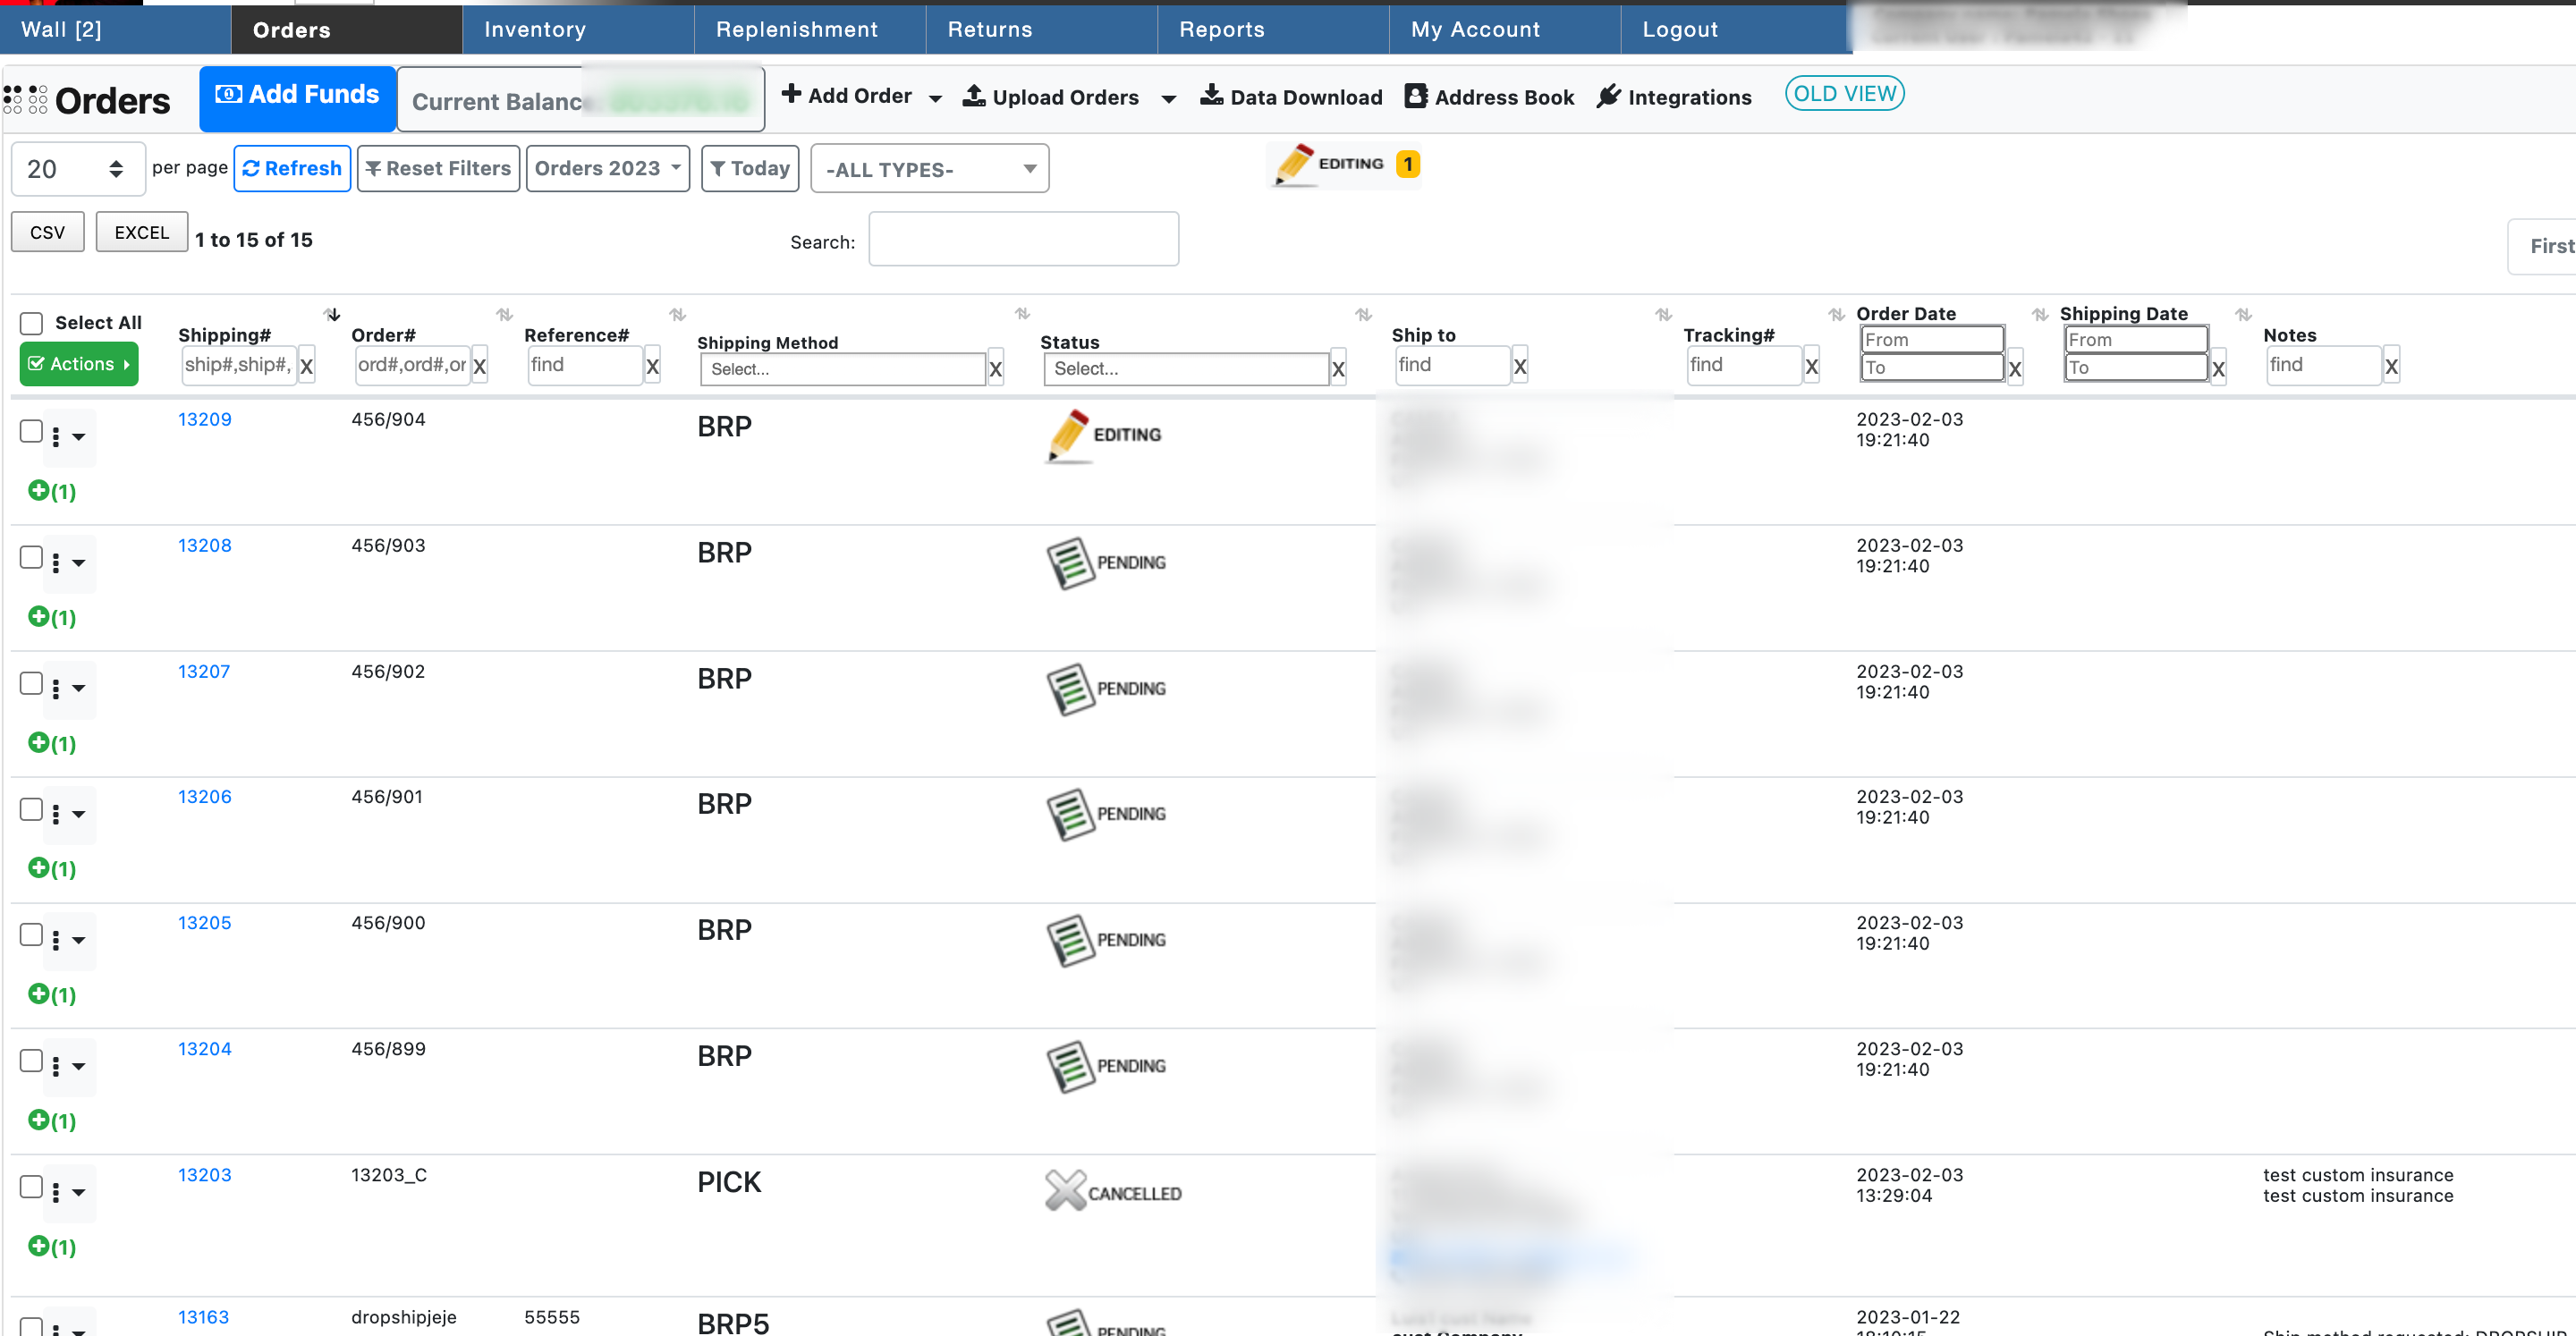
The orders tab is the page from which OMS users can view, create, and edit orders from each of their individual channels in the same place. This document will attempt to explain the actions you can take from this view. We will begin with the eight icons across the top of the screen.
Current Balance
This will display your current balance, it will turn red if the balance is negative.
Add Funds
This button will take you to the fund’s page where you can add funds.
Add Order
Here you can create individual manual orders. More information can be found here.
Upload Orders
Here you can upload orders via .csv files. More information can be found here.
Data Download
This button links to a page where you can filter orders and download their data in bulk.
Address Book
This button links to a page where you can see your client contacts.
Integrations
This button links to a page where you can see a list of the channels integrated into your OMS.

Display number.
This number will display the number of orders, it can be set up to 5000 orders.
Refresh.
This will refresh the orders page, so new orders from channels can be synced.
Reset Filters.
This will blank the filters if set up before.
Year Orders.
This will let you see orders from past years or the current year.
Today Filter.
This will display the current date orders only.
All Type Orders
This lets you filter orders based on their type.

CSV.
Exports the current view as a CSV comma-separated file.
Excel.
Exports the current view as an Excel spreadsheet file.
Search.
This field receives any kind of information related to the order. Shipping orders, tracking orders, and others.

Order Headers.
These headers can be set up with their respective information and orders will be filtered out.
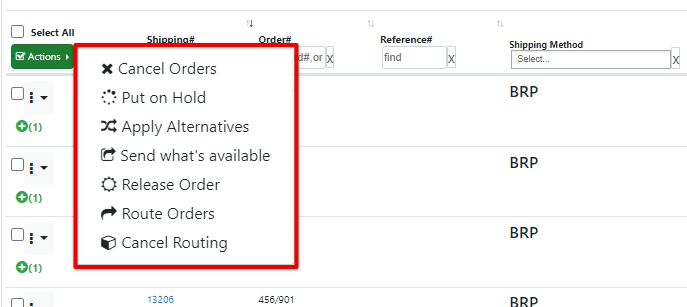
Order Actions.
These actions can be executed only if there are orders checked before.
Address Book.
The address book is predictable for storing contacts. You can edit them by pressing the highlighted buttons. You can also add contacts individually with the “Add Contact” button or upload contacts with a CSV file. There is a download link to the template after pressing “Upload File.”.

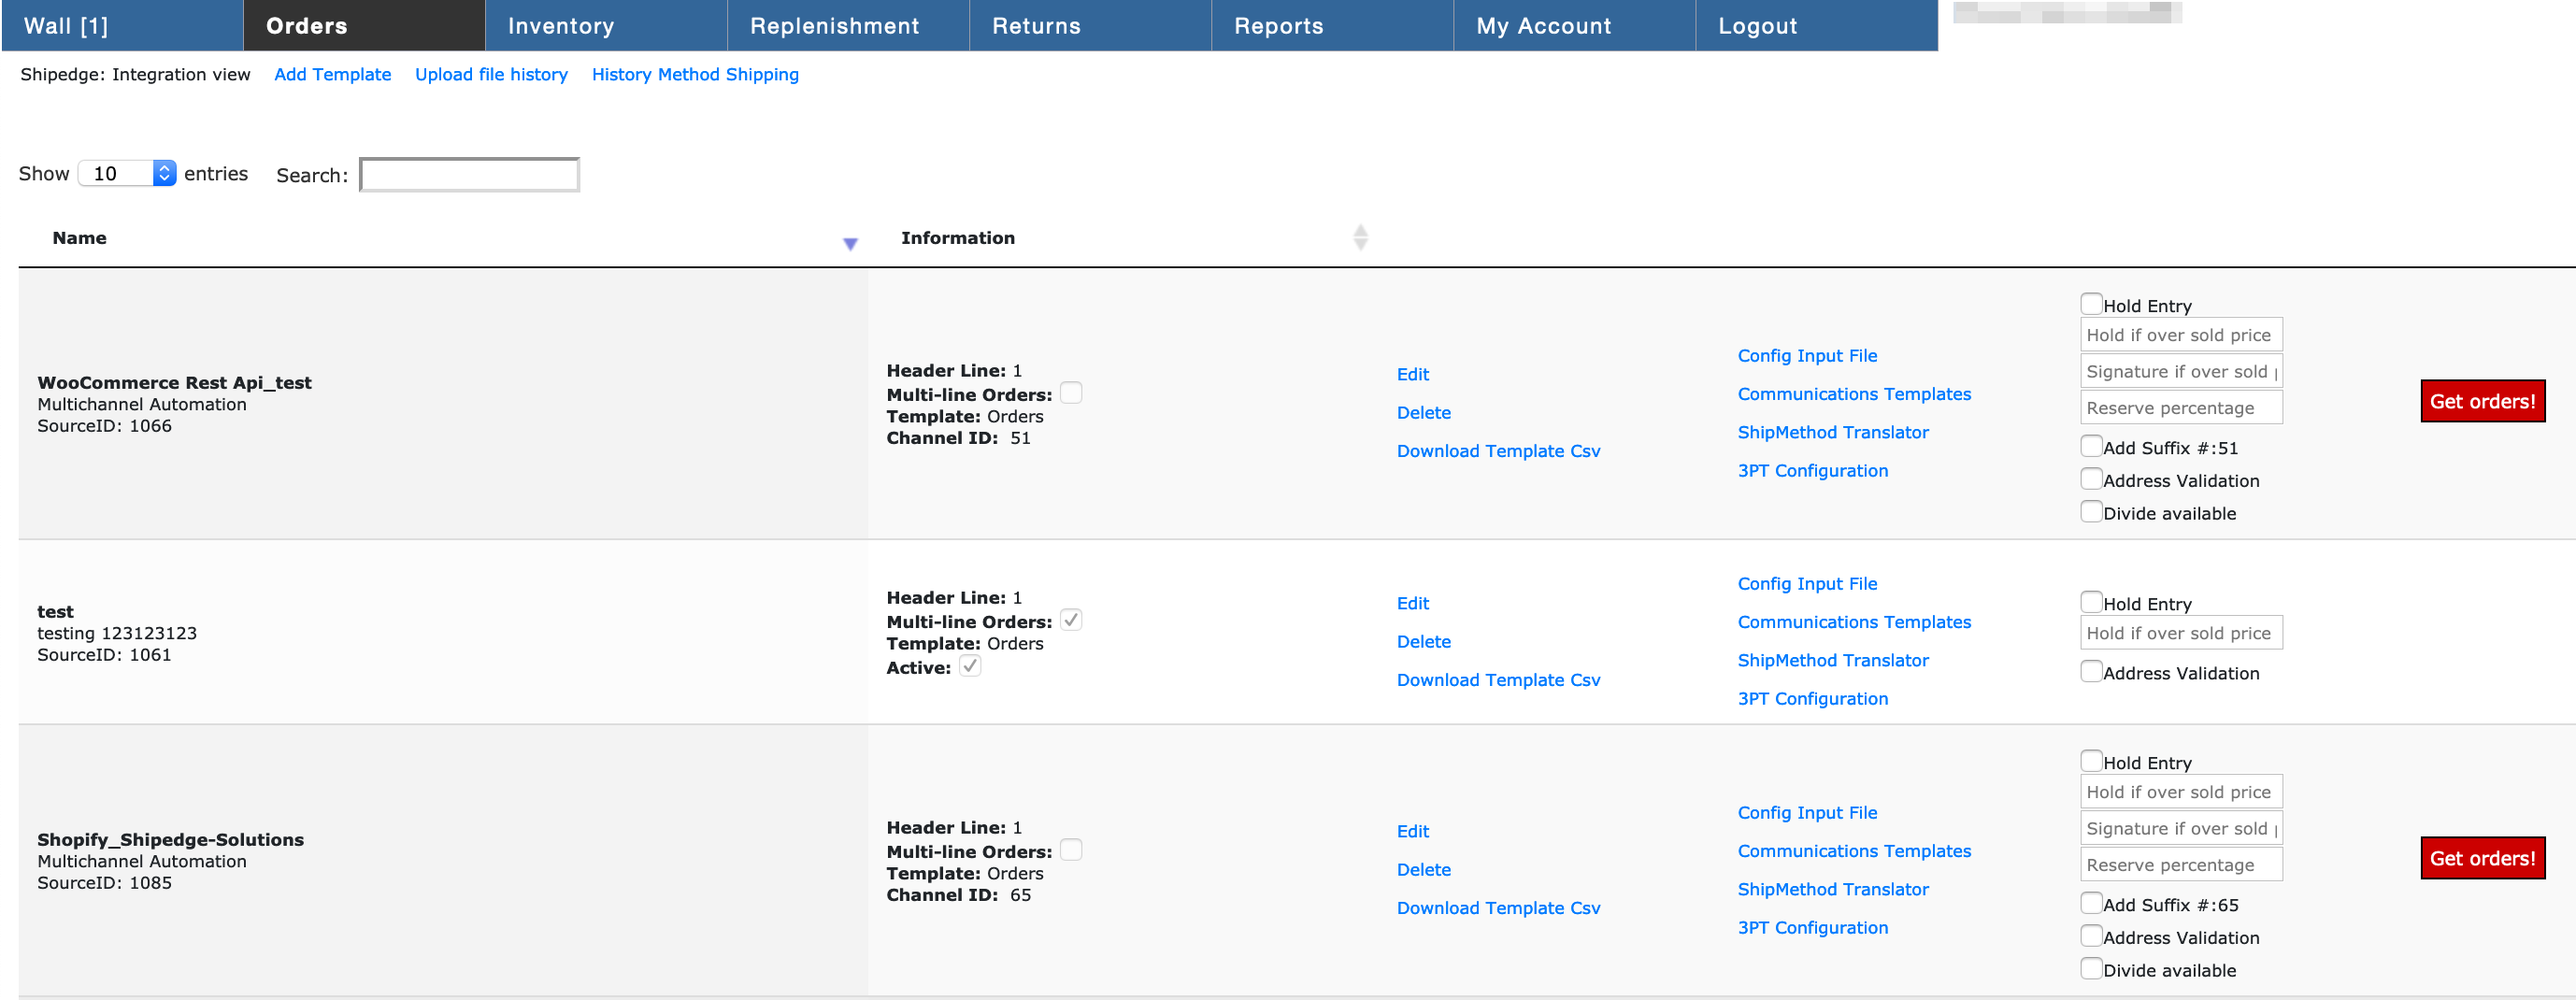
Integrations.
The Integrations page allows you to configure integrations with other services as well as create templates with which to upload orders. There is more information on this view here. Each of the integrations on this page can be viewed as an order source. They can also each have an order template associated with them in the event that you need to export orders from a channel and re-upload them as a CSV.
Unlock Barcode.
The unlock backorders button only appears under two conditions.
1. You must have backorders in the system.
2. Those backorders must require some product that is available in addition to the product that is not.
The purpose of this feature is to divide orders into what they can send and what they cannot. If an order calls for 1 “redshirtXL” and 2 “greenshirt XL,” but you have only the “redshirtXL,” Unlock Backorders will split the order into two orders, one for 1 “redshirtXL” and one for the 2 “greenshirtXL.” Note that clicking this button brings another window allowing you to select which orders you want to divide, it does not divide all backorders automatically.

Backorder View.

This window shows each order record. You can view, edit, divide, or cancel the order from this window. You can also put the order on HOLD and release held orders. Note that the system holds orders by changing the shipping method to HOLD, keeping them from being processed.