Creating A New OMS
1. Go to your warehouse’s website URL.
All fulfillment companies that use Shipedge have their own personalized server that has a custom URL (Example: ###.shipedge.com) ### being the custom subdomain of the fulfillment company.
2. Click The Register Button
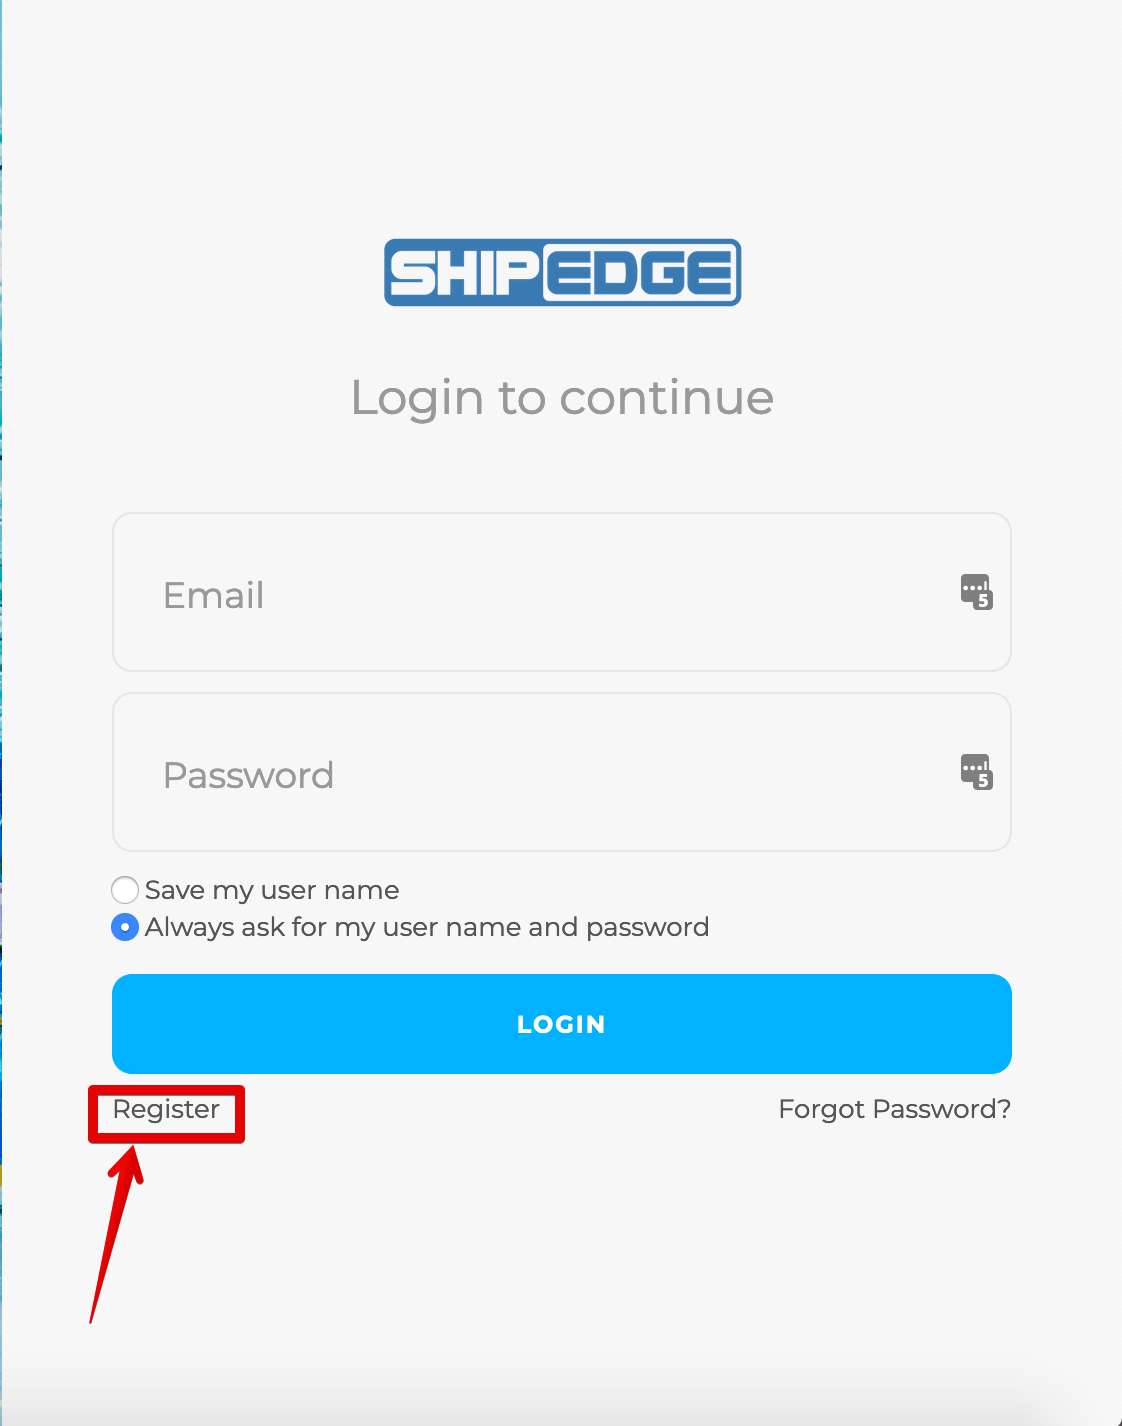
Click on the Sign-Up Now button on the log in page to register a new account.
3. Fill In The Username/Password/Email/Plan

1. Enter your login username.
2. Enter your password.
3. Confirm the password you entered.
4. Enter your email address you wish to use with your account. We will email the welcome email to this email address once your account is activated.
5. Select the payment plan you wish to use. Discuss the different options with the fulfillment company to see which one better suits your company’s needs.
6. Click Continue to go to next page.
You can also reset and start over by clicking the Reset button.
4. Fill In Company Information
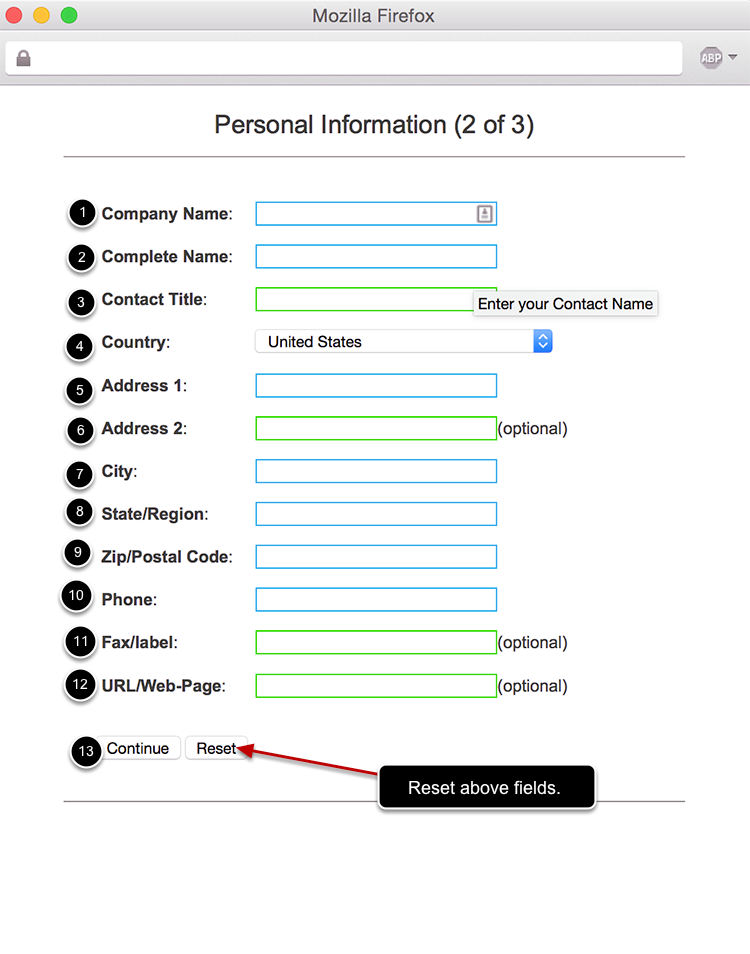
1. Company Name – Name of your company.
2. Complete Name – Your full name.
3. Contact Title – Your position/title at the company.
4. Country – The country your company is located in.
5. Address 1 – The address of your main company office.
6. Address 2 – Optional field for longer addresses.
7. City – The city of your main company office location.
8. State/Region – The state of your main company office location.
9. Zip/Postal Code – The zip code of your main company office location.
10. Phone – The phone number you use.
11. Fax/Label – The fax phone number of your company (optional).
12. URL/Web-Page – The URL/website of your company (optional).
13. Continue – Click the Continue button when you have filled in all the required fields.
You can also click on the Reset button to reset the above fields and start over.
5. Accept Terms of Condition
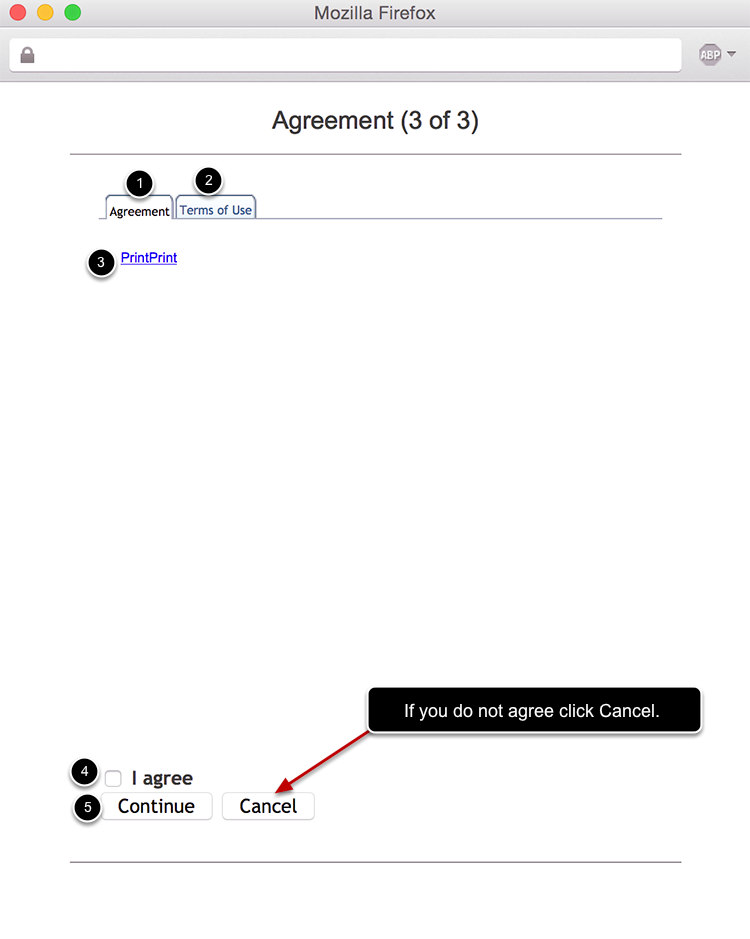
1. Agreement – View or Print the Agreement to use and operate Shipedge. Must be read and agreed upon to be able to register an account with Shipedge.
2. Terms Of Use – View or Print the Terms Of Use to use and operate Shipedge. Must be read and agreed upon to be able to register an account with Shipedge.
3. Print – You will have the option to print both the Agreement and the Terms of Use.
4. I Agree – Check the I agree button to be able to continue. This means you have read the terms and agreement and agree to Shipedge’s Terms Of Use and Agreement.
5. Continue – Hit the Continue to finish your registration after selecting the I Agree button.
6. Registration Complete
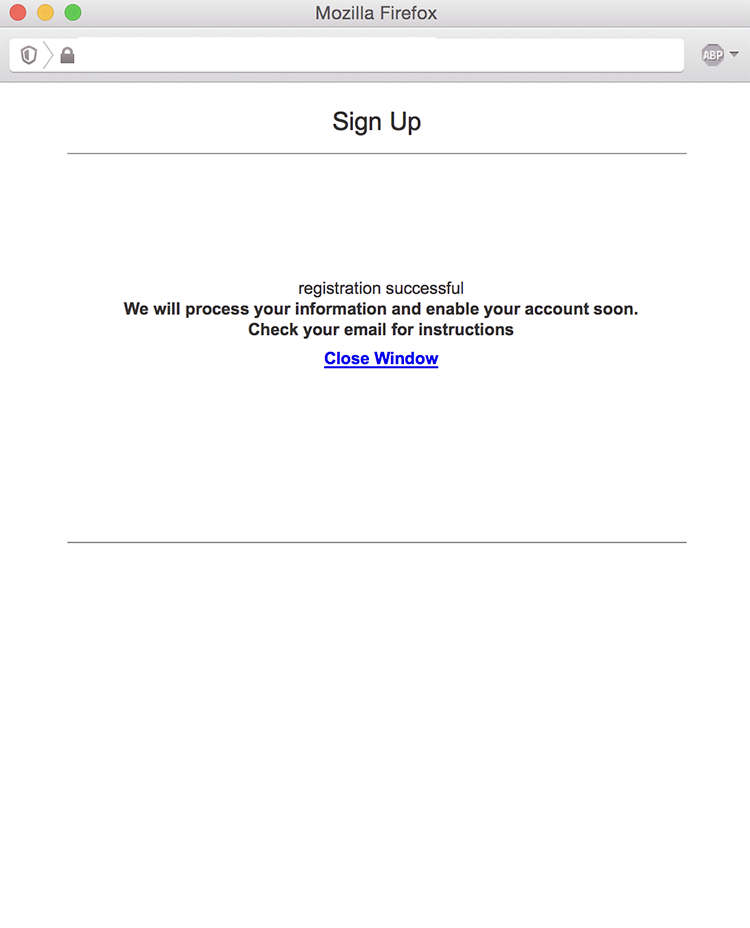
Once you get to this screen you have completed your registration. Now you must wait to receive an email from Shipedge stating that your account has been activated and some introductary information that is important. The email will be sent to the email address used to register the account. You can close the window by exiting out or clicking on the Close Window link at this time. Most accounts are activated pretty quickly after registration.