How to Set Up Walmart Integration
Walmart steps
- Signup for a Walmart Seller Account.
- You can Generate your credentials (Consumer ID and Private Key) in the Developer Portal. You can access the Developer Portal in Seller Center by selecting the Settings icon and selecting API Key Management under API.

Next, select API Key Management to access the developer site. This will automatically log you into the Developer Portal using your Seller Center credentials. You can also access various documentation by selecting the links under the Quick Links heading.

Alternatively, visit the Developer Portal directly and log into the system.
Generate Credentials in Developer Portal
- In the Developer Portal, click My Account in the top right corner, and select Marketplace (US & Mexico) as the Login Type.

Your login details are the same as your Seller Center credentials.
- Next, you will be directed to a page where you can generate your API credentials (Client ID & Client Secret).

- Please make use of the keys retrieved in the previous step to get a short-lived token using the Token API. This token has a 15-minute lifespan and must be regenerated if that time passes.
- Use the headers listed in the API Documentation to authenticate your API call. These headers are mandatory for all API calls to authenticate and authorize the partner.
Shipedge steps
- To integrate Shopify, simply go to Shipedge OMS > My Account > Preferences > Channel Automation and look for Walmart.

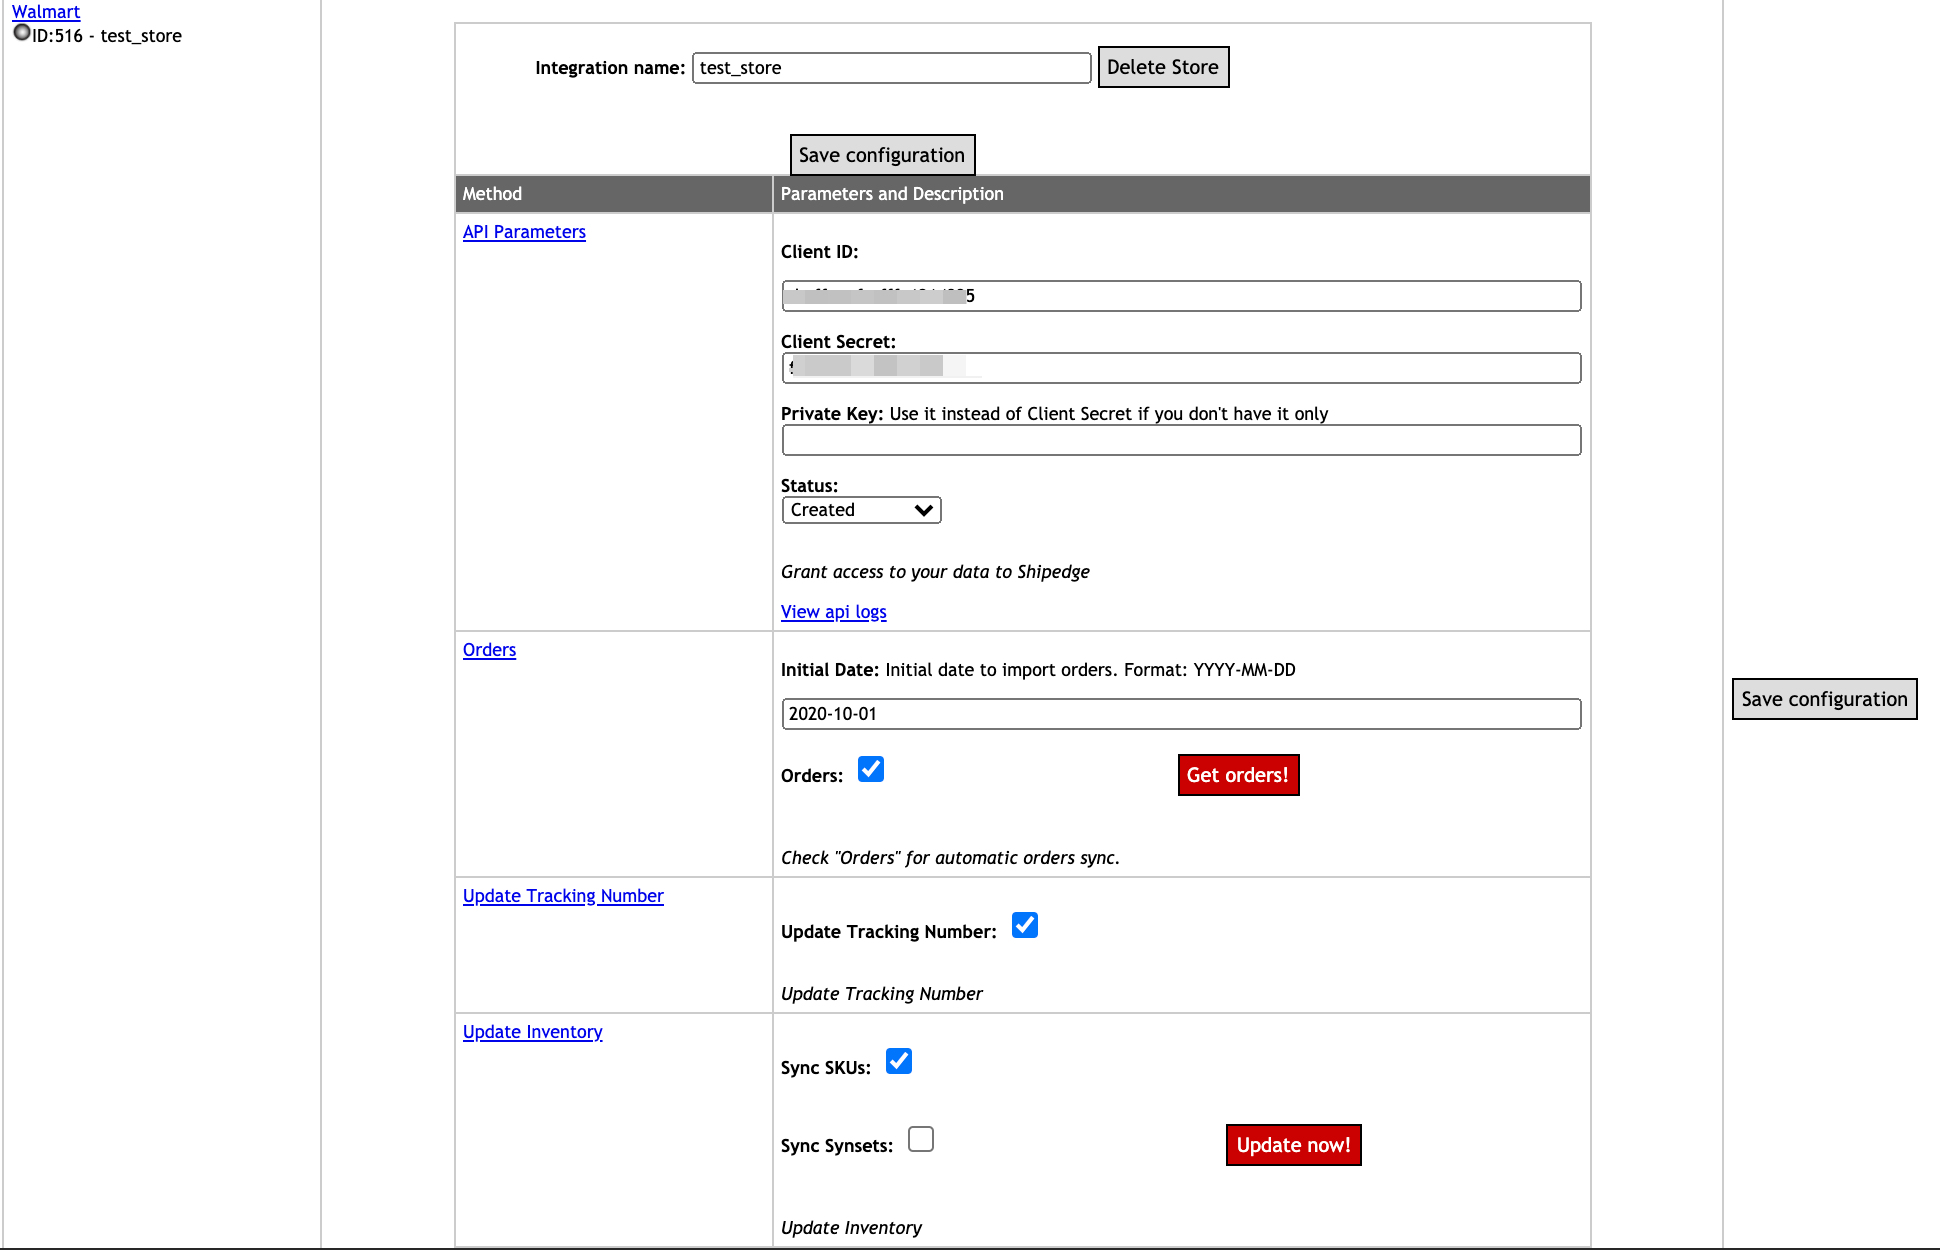
- Click on Walmart, name your WooCommerce Store, and click on Add New Store.
- Enable the features you will be using:
- Orders – for getting orders from Walmart into Shipedge.
- Update Tracking Number.
- Sync SKUs and Synsets.
- Enter the information that was generated in your Developer Portal account like Client ID, and Client Secret.
- You can use a Private Key instead of a Client Secret if you don’t have access to that. The Private Key can be found in the Seller Account.
- You need to provide an Orders status (e.g. Created) for the orders you want to import.
- In the Initial Date field, you need to put the date you want to start importing the orders from (e.g. 2020-10-15).
- Address Verification, Residential Check, and Ship Method Translator.
- Hover on the Orders section and then select Integrations. Then, look up the WooCommerce integration name you set up before.

- Click on the tool icon and check the Address Verification & Residential Check.

- Ship Methods and API Errors.
- As this is considered a new integration some orders may initially come in with an API Error. As they do please be sure to map the ship methods to prevent errors on future orders.
You can also map the Ship Methods by clicking the Checklist Icon and then selecting ShipMethod Translator.
- As this is considered a new integration some orders may initially come in with an API Error. As they do please be sure to map the ship methods to prevent errors on future orders.
- Hover on the Orders section and then select Integrations. Then, look up the WooCommerce integration name you set up before.
- The orders will get updated every hour.

- Click Save configuration.
- Click on the Save Configuration button placed above the API parameters section.

- Click on the Save Configuration button placed above the API parameters section.
