Salla Integration to Shipedge
In this article, we are going to show you how to create a Salla integration.
There are two procedures to establish a successful connection. One on the Salla platform and the second one on the Shipedge system.
TABLE OF CONTENTS
Salla Initial Steps
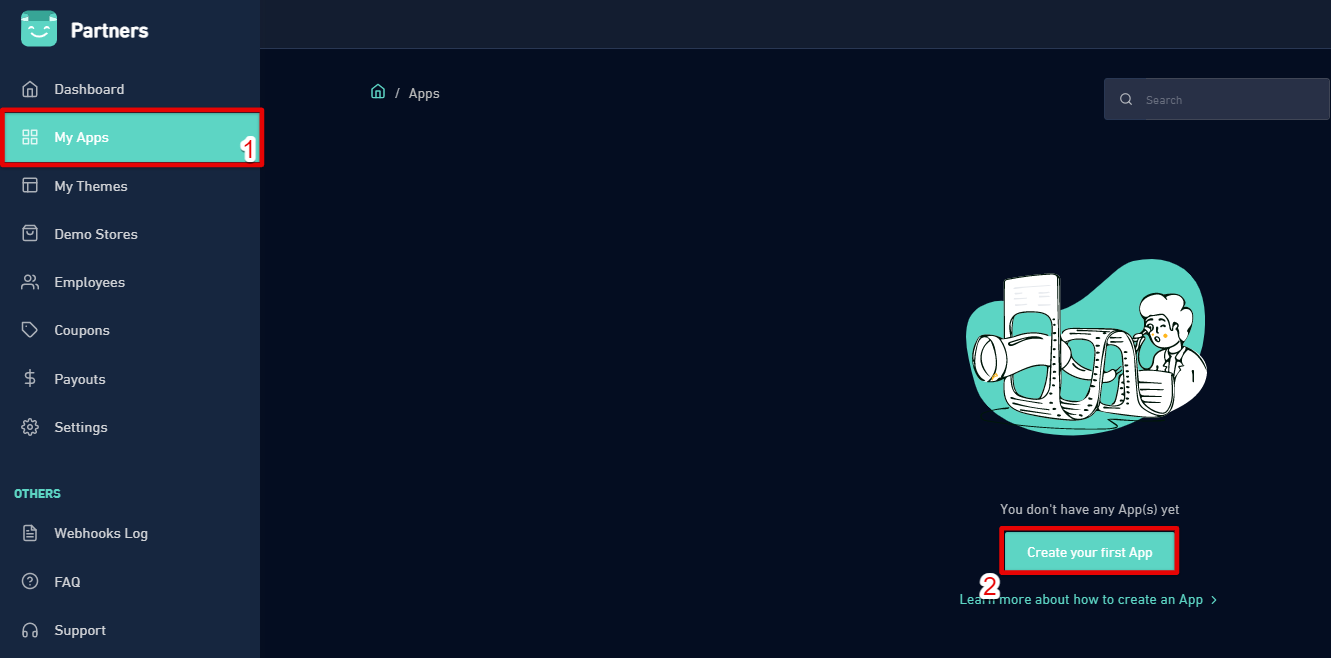
- Log in to https://salla.partners/ go to the left-hand menu and click on the create an APP button.

- Select “Private App”. Click on continue.

- There are 4 fields to complete information in this section. App Name, App Description, App website, and support email.We are going to explain what should be placed on those fields.
- Name, we highly suggest you keep the name simple like storeName_Shipedge. So it is easy to recognize.
- Note: There is a language switch that toggles between Arabic and English. The app name has to be submitted in both formats, click on the icon at the right edge of the app name box to switch the language.

- Note: There is a language switch that toggles between Arabic and English. The app name has to be submitted in both formats, click on the icon at the right edge of the app name box to switch the language.
- This is personal for you but is ok to have a complete description. Something like: This application integrates with Shipedge OMS for: Getting Orders, Update Tracking, and Sync Inventory.

- The App website is: https//www.shipedge.com
- The App support email is: help@shipedge.com
- Click on Create App.
- Name, we highly suggest you keep the name simple like storeName_Shipedge. So it is easy to recognize.
- The next view is the App’s general settings view.
- In this section, make sure that the Custom Mode is checked.

- In the next section, Callback URLs are as follows:
- In the following section, App Scope, the following attributes must be checked with the read and write option.
- – orders – metadata – shipping – webhooks – products
- The other attributes must have the read-only option checked.
- The webhook/notification field must be filled out with this URL: https://connector.shipedge.com/app_callback/salla
- Choose the Merchant Store field. This option is at the bottom of the configuration page.
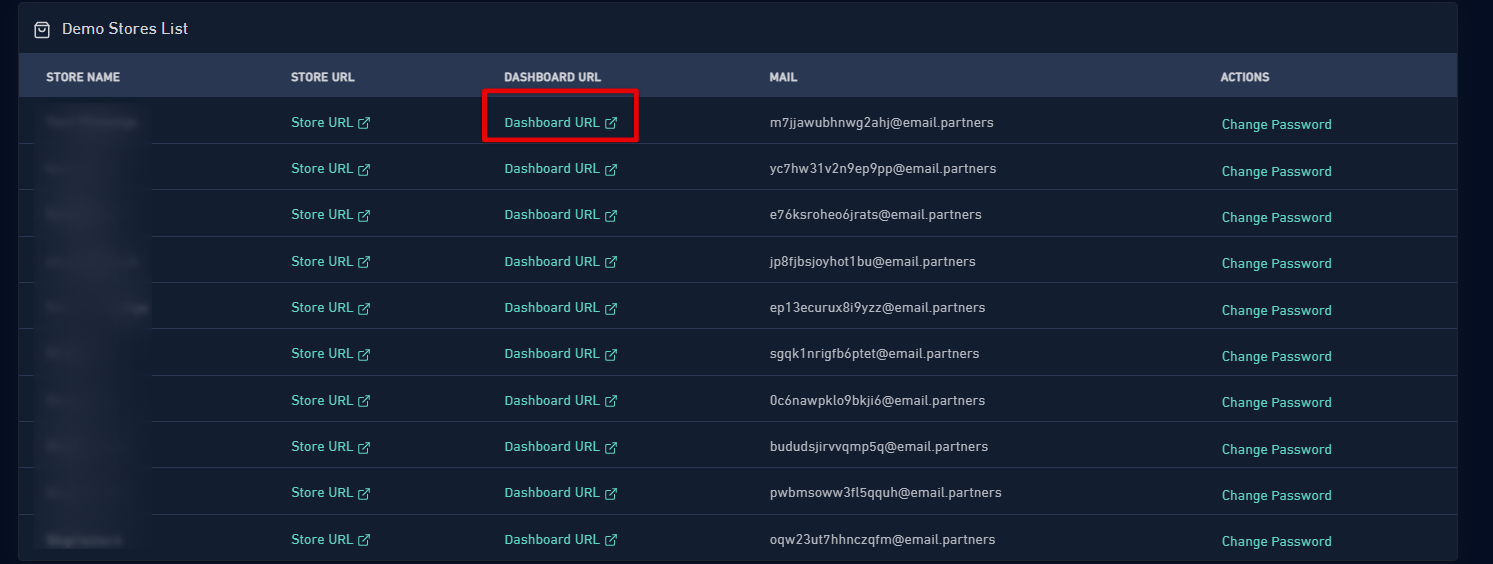
- In this section you have to place the store URL you are willing to connect. Navigate to the Stores option on the left-side menu and click on the Store URL to copy the URL. (This is a demo account so the image is just a guide).

- Go back to the app configuration panel. and paste the URL in the Choose Merchant field. Do not click on Request access just yet. Before that, we need to request the connection from the Shipedge platform. We are going to get back to this section to complete this procedure soon.

- IMPORTANT NOTE your store URL is a long URL code. If we copy/paste that URL in the merchant store field the connection will fail, and an error message will be displayed indicating that that URL does not exist. To solve this issue you have to take a closer look at your URL.
- Ex https://salla.sa/dev-e_yourstore_code?expires=1669920429&identifier=643119423&utm_source=portal&signature=c74bc4d0a56c15fc3eb6eae55124fcbb2d6b35185ab371cba46f165fa3119f71
- In the example above we just need the info before the question mark, whatever it is after the question mark is not needed including the question mark. The URL to use will look like this.
- https://salla.sa/dev-e_yourstore_code Please keep this in mind.
- In this section you have to place the store URL you are willing to connect. Navigate to the Stores option on the left-side menu and click on the Store URL to copy the URL. (This is a demo account so the image is just a guide).
Shipedge Steps
- To integrate Salla, simply go to Shipedge OMS > My Account > Preferences > Channel Automation and look for Salla. Add a specific name for your integration. and click on add store. if any alert comes up click on OK
- New options will be available. API Parameters is the first one.
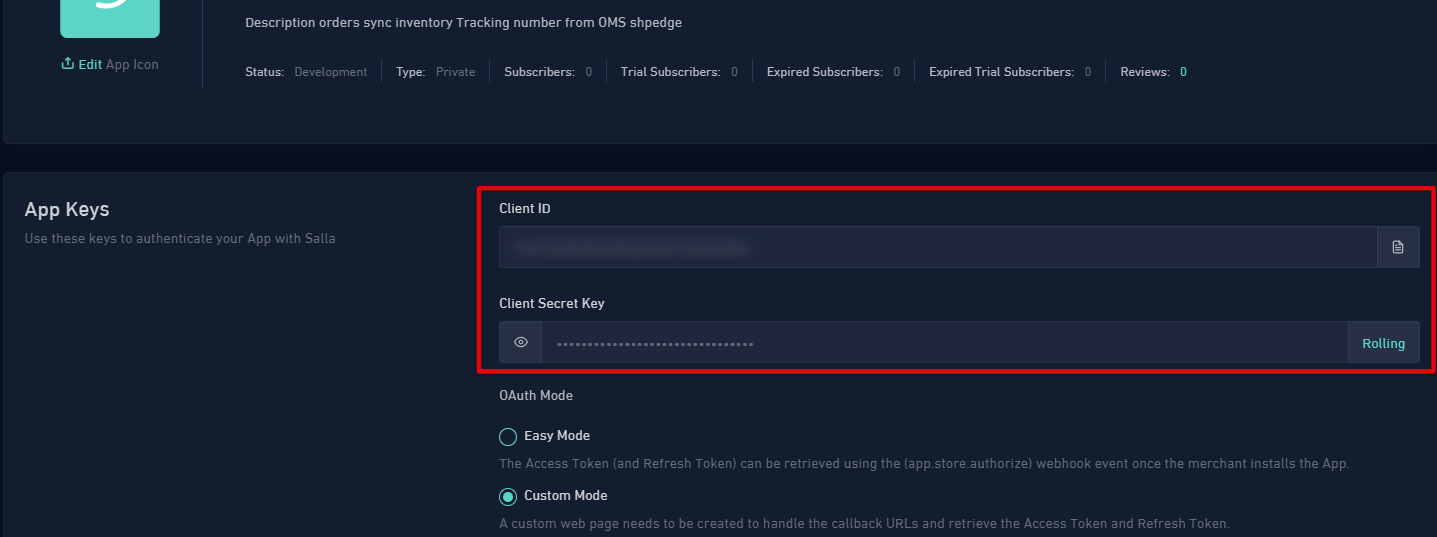
- Under this section, you will be asked for the client ID and Client’s Secret both can be found under the private app created in Salla previously.

- Salla client’s ID and client’s secret.

- Copy those credentials and place them into the Shipedge API parameters section.
- Now, click on Authorize., a red button is placed above the client id field. A prompt to log in to Salla will pop up. The mail field here is the one from the Salla platform.
 This mail must be placed here in addition to the password.
- On this screen you can click on authorize app.

- This message will appear in the response.

- Under this section, you will be asked for the client ID and Client’s Secret both can be found under the private app created in Salla previously.
- To finish the Shipedge connection you can check the following sections. Orders, Sync Inventory, and Update tracking number. You can fill the order section with the format DD:MM:YY.

- For the inventory.
- ****We highly suggest you do NOT check these two boxes in the Update Inventory section until your SKUs have been received into the Warehouse Management System. This will prevent any discrepancies in your inventory quantities on Salla.
- Address Verification, Residential Check, and Ship Method Translator.
- Hover on the Orders section and then select Integrations. Then, look up the Salla integration name you set up before.

- Click on the tool icon and check the Address Verification & Residential Check.

- Ship Methods and API Errors.
- As this is considered a new integration some orders may initially come in with an API Error. As they do please be sure to map the shipping methods to prevent errors on future orders.
You can also map the Ship Methods by clicking the Checklist Icon and then selecting ShipMethod Translator.
- As this is considered a new integration some orders may initially come in with an API Error. As they do please be sure to map the shipping methods to prevent errors on future orders.
- Hover on the Orders section and then select Integrations. Then, look up the Salla integration name you set up before.
- You are all set up on the Shipedge side. Let’s continue the final steps on the Salla side.
Salla Final Steps
- Right where we left off on the Salla configuration. Now you can click on Update Request Access. your screen will look like this.

- To approve this request now you have to go to your store menu and click on dashborad.

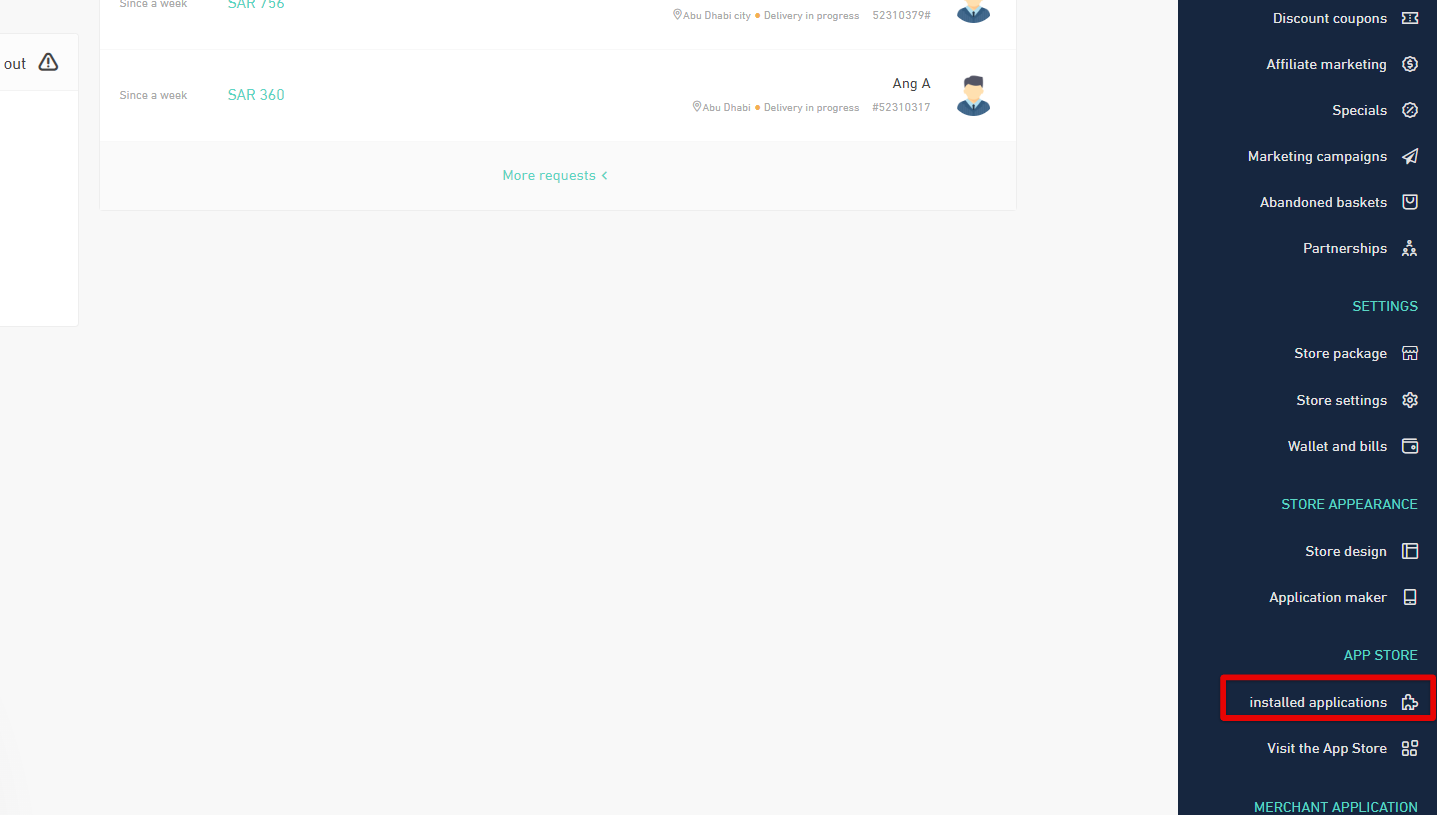
- On this view go to the right-hand side menu and look up the Installed Applications and click on it.

- There you will have an alert asking you to consent or reject the requested connection, click on consent.

- On the next view click on authorize App. And that will conclude with the connection process.

- Your previous page now will display the connection established thru the private app.

