Upload Orders Workflow – by CSV or Spreadsheet
OMS Describing Steps
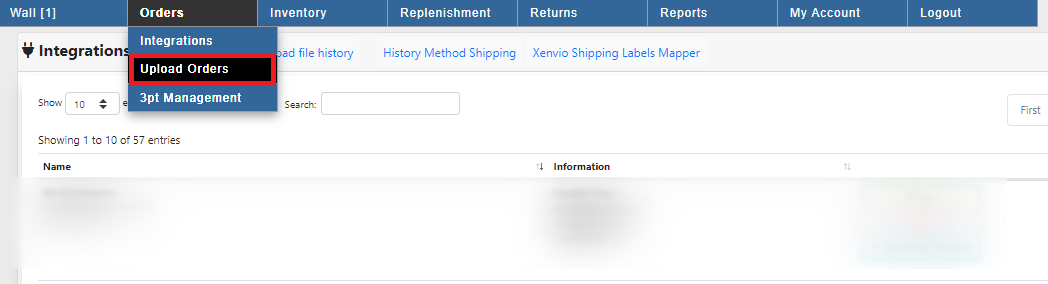
In the OMS view hover over the Orders tab and click on the upload orders option.
You will get the following view.

1 Download Template – This will let you download a standard template with all the recommended fields in a CSV format. You can also customize your own.
2 Upload File History – This will show a list of the files that have been previously uploaded.
3 Custom CSV and Configuration – This will take you to the integrations panel where you have to select the upload file history > Upload Orders to upload a custom CSV. You can also be able to see the custom files uploaded before.

4 Browse – Opens up a dialog box where you can select the CSV file needed.
5 Mapping – Once the CSV file is selected, Click on Mapping which will upload the CSV and identify the fields that your file has and compare it with the ones that Shipedge waits for. If there are fields that are not connected automatically the system will ask you to connect them manually in the following diagram.

You have the file headers and the System’s headers. Notice that some of the system fields have the * at the front which means that those headers cannot be empty. This example was made the standard template so all of the fields were connected automatically.
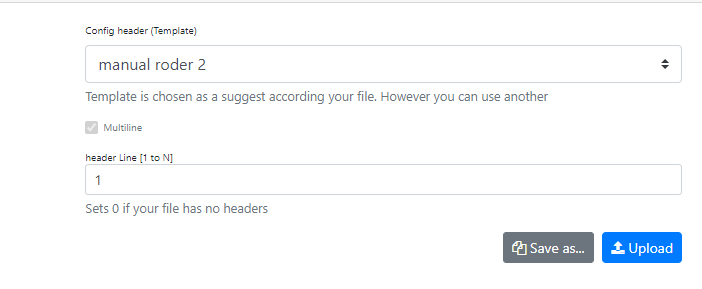
Finally, you can configure the header disposition with some of your templates this is done to save this current format of data.
Click on Upload.
You will get the following view, this will detail the process status and also will let you access the original file uploaded previously.

Orders With Multiple SKUs.
When an order has multiple SKUs to take items from, you can describe that in your CSV file by assigning one row to each SKU. Meaning that an order can be repeated in different rows with different SKUs. Take a look.
