Amazon Seller Central – SP API
TABLE OF CONTENTS
How to Integrate with Amazon SP Central
This guide will show you how to integrate with the Amazon SP API for Amazon Seller Central (updated as of 06/30/2022).
1. In the OMS system navigate to My Account > Preferences.
2. From the Channels, click on the Amazon SP and name your store.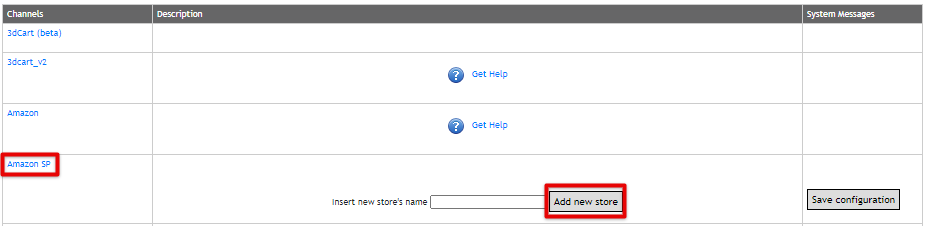
3. Select V2 and Authorize 
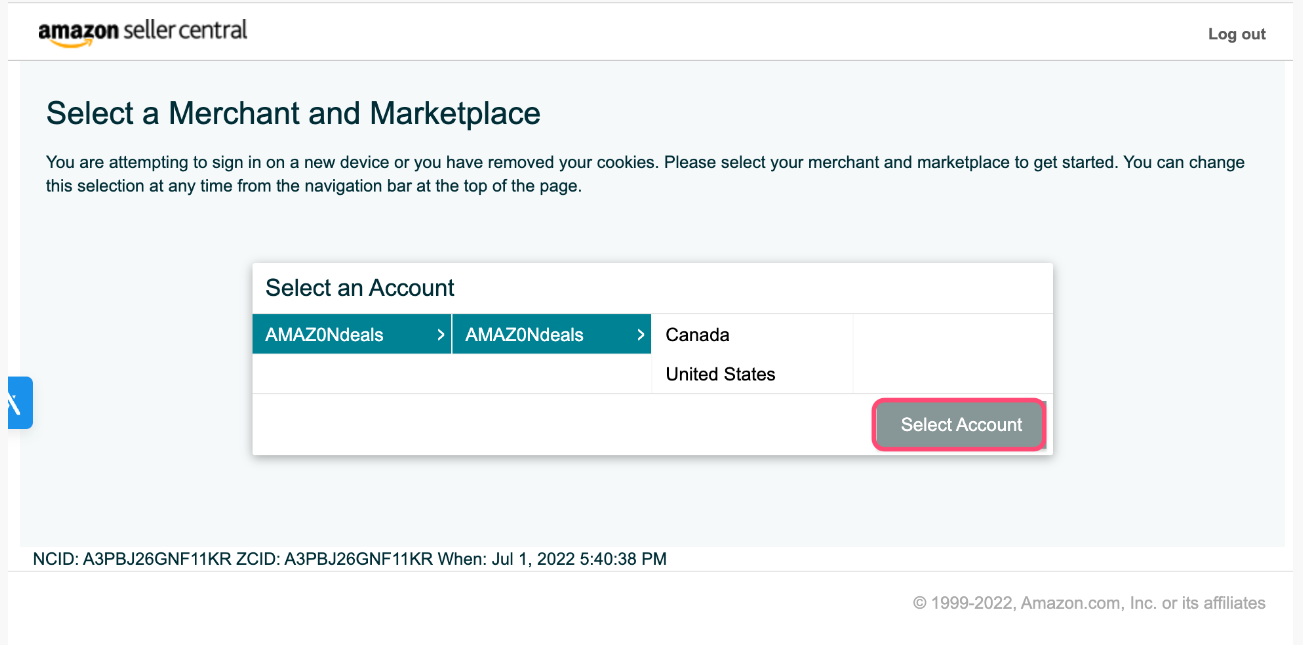
3.1 Once you click the button you will need to log in to your Amazon Seller Central account.
3.2 If you have multiple seller accounts or are selling in multiple regions you will need to select the correct one to integrate into your Shipedge OMS.
Once the account is selected, please click on the Select Account button.
• Please review the scope of the permissions.
• Check the checkbox if you agree with the permissions above.
• Hit the Confirm button when you’re ready to move forward.

4. Important:
The MarketPlace ID will be needed only if your store is international. The default setting is the US, please check the following link to check the MarketPlace ID for your store if needed.

5. Orders And Tracking Number
• You must check the Orders box
Then you can determine what kind of orders are you willing to pull from the Amazon platform.
Prime Orders, Non-Prime Orders, or All Orders.
Then click on the Get Orders button.
• You must check the Update Tracking Number in order to update the order’s assigned tracking number back on the Amazon site.

6. Update Inventory
There are two options in this section. You can update the SKUs and/or the Synsets. This depends on how your inventory is organized within your OMS. Once you have made your selections hit the Update button to sync your Inventory.

Please Note: The Vendor Central section and checkboxes do not need to be completed for Seller Central accounts.
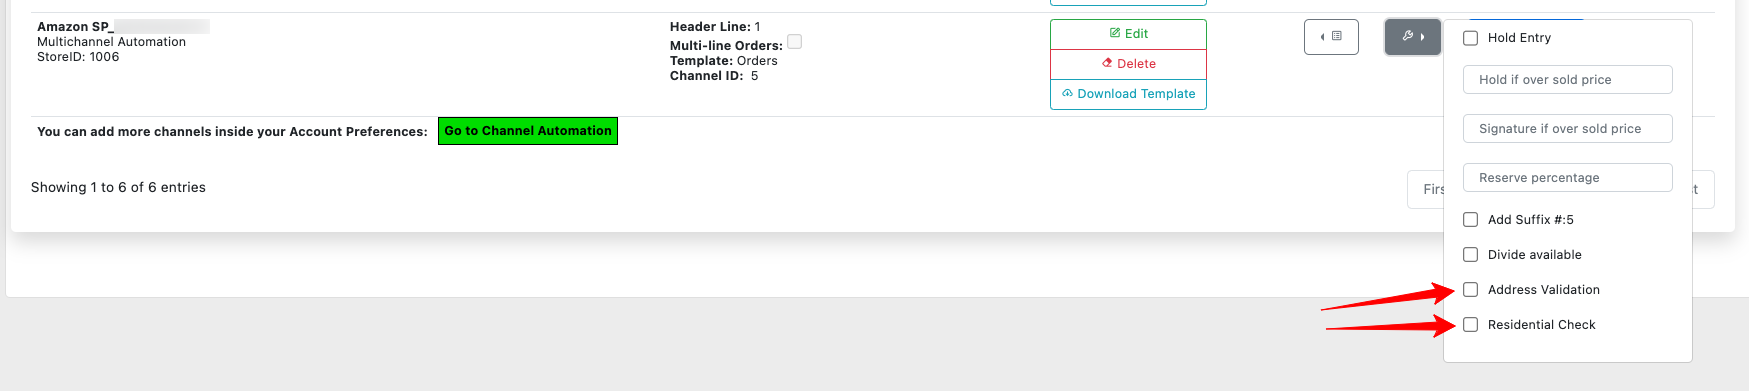
7. Address Verification, Residential Check, and Ship Method Translator
Hover on the Orders section and then select Integrations. Then, look up the Amazon SP integration name you set up before.

7.1 Click on the tool icon and check the Address Verification & Residential Check
7.2. Ship Methods and API Errors
As this is considered a new integration some orders may initially come in with an API Error. As they do please be sure to map the ship methods to prevent errors on future orders.
You can also map the Ship Methods by clicking the Checklist Icon and then selecting ShipMethod Translator
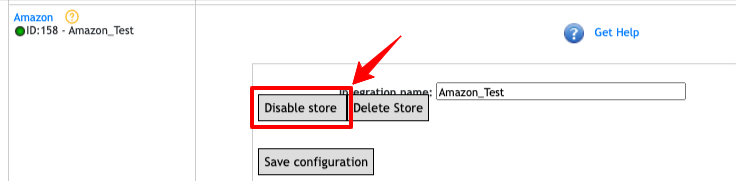
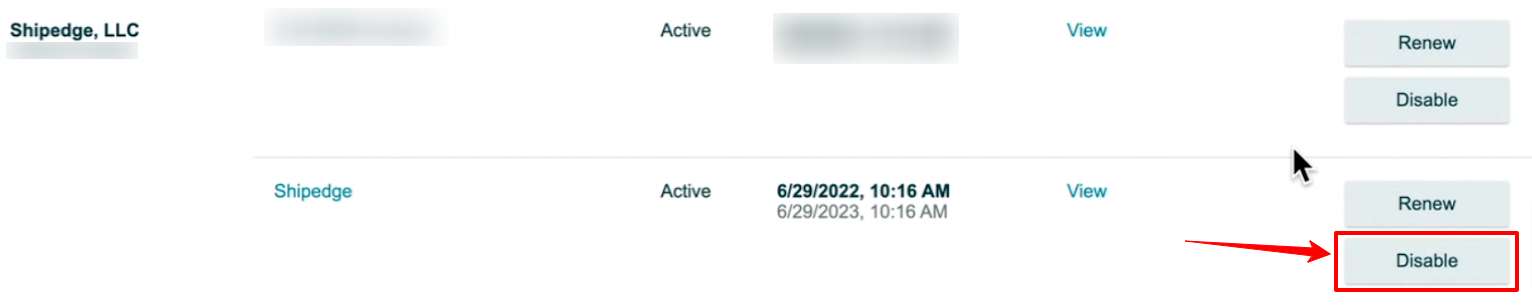
8. Once all of your selections and configuration are completed with the updated Amazon SP integration, please be sure to DISABLE the original Amazon integration (if it was activated) to ensure there is no conflicts.
You are now Set!
Troubleshooting
Not seeing orders after integration is configured?
Many times with a new integration the orders will enter in an API Error status. API errors can occur for a variety of reasons but in the case of switching to an updated integration, it is most likely due to the Shipping Method not being configured. To clear these errors you can select the API Errors button from the top of your Orders page in the OMS:
Below are several articles that will help you resolve these API errors:
- FAQ: Why Do Orders Go to API Error?
- FAQ- Getting API errors for Shipping method
- How to Resolve API Errors: SKU
- How to Resolve API Errors: Name
- API Error: Order#
How do I delete the integration and set it up again?
If you need to start over with the Amazon SP integration setup after it had previously been Authorized it is important to first ensure that the Shipedge app has been disabled/deleted from the Seller Central Account by following these steps:
- Within Shipedge go to the Channel Automation page and DELETE the Amazon SP integration that was already set up.

- Login to your Amazon Seller Central account.
- Go to Manage Apps.
- Find the Shipedge app and if it is Enabled then Disable it (this will de-authorize the app).
- Go back to the Shipedge Integrations page and begin the Authorization process again (Step 1 of this article).