Amazon Vendor Central
This article will show you how to set up the Amazon Vendor SP integration in Shipedge. Included in this article you will find the steps to configure the Amazon store site.
1. In the OMS system navigate to My Account > Preferences and select Channel Automation.
2. Look up the AmazonVendor SP integration. Click on it and name your Store then click on Add New Store. An alert will be displayed, click on Ok.

3. New options will be displayed. Click on the Authorize red button.

3.1 A new dialog window will pop up. You will need to log in to your AmazonVendor SP account.

3.2 If you have multiple seller accounts or are selling in multiple regions you will need to select the correct one to integrate into your Shipedge OMS.
Once the account is selected, please click on the Select Account button.

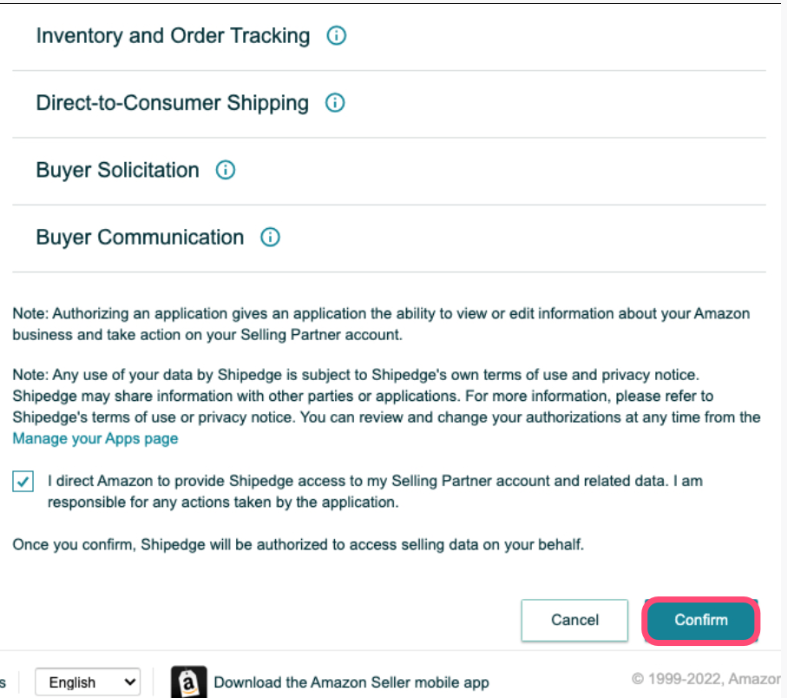
• Please review the scope of the permissions.
• Check the checkbox if you agree with the permissions above.
• Hit the Confirm button when you’re ready to move forward.
4. Fill out parameters.
4.1 The Amazon MarketplaceID is a static value based on your region. Details on what value to use can be found
at this link: https://docs.developer.amazonservices.com/en_UK/dev_guide/DG_Endpoints.html

4.2 The Seller ID, is a string of numbers usually found in the URL for your products, or your storefront. Details on how to find this value here: https://www.asellertool.com/manual/1/en/topic/how-to-find-your-amazon-seller-id

5. Orders.
5.1 You must check the Orders box for automatic orders sync.

5.2 Init date is the date to start import orders and the format is: 2022-01-01T20:35:39Z is important to follow this format.
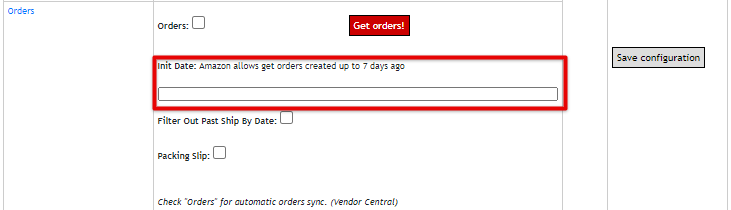
You can also check the Filter Out Past Ship Date and the Packing Slip options.
6. Update Tracking and Inventory.
6.1 In this section you must check the Update Tracking option.

6.2 Update Inventory.

****We highly suggest you do NOT check these two boxes in the Update Inventory section until your SKUs have been received into the Warehouse Management System. This will prevent any discrepancies in your inventory quantities on AmazonVendor SP.
7. SAVE your configuration.
Please make sure to save your configuration by clicking on the Save Configuration button placed above the
API Parameters section.

Congrats you are now set!