How to Set Up Magento2 Advanced Integration
This article will show you how to set up the Magento2 Advanced integration in Shipedge. Included in this article are the steps to generate the API Access Token within Magento2 as well as the setup steps within the Shipedge Channel Automation Page.
Magento2 Advanced – Generating API Access Token
1. Log in to your Magento2 account.

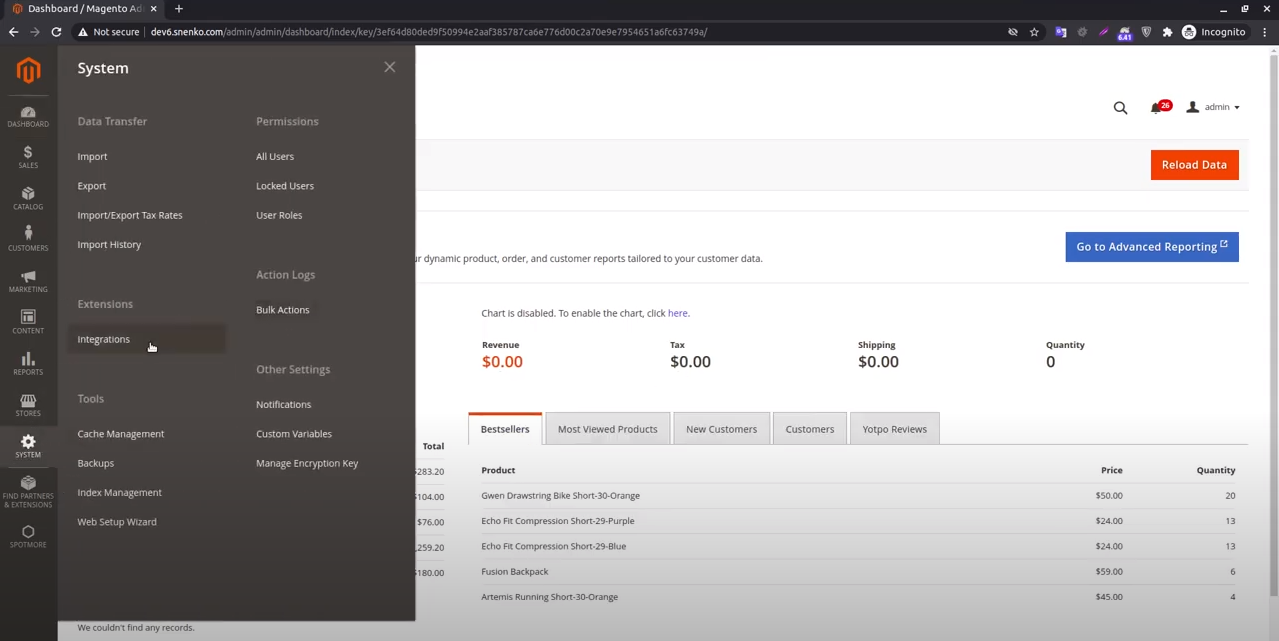
2. Click on the System icon and select Integrations.
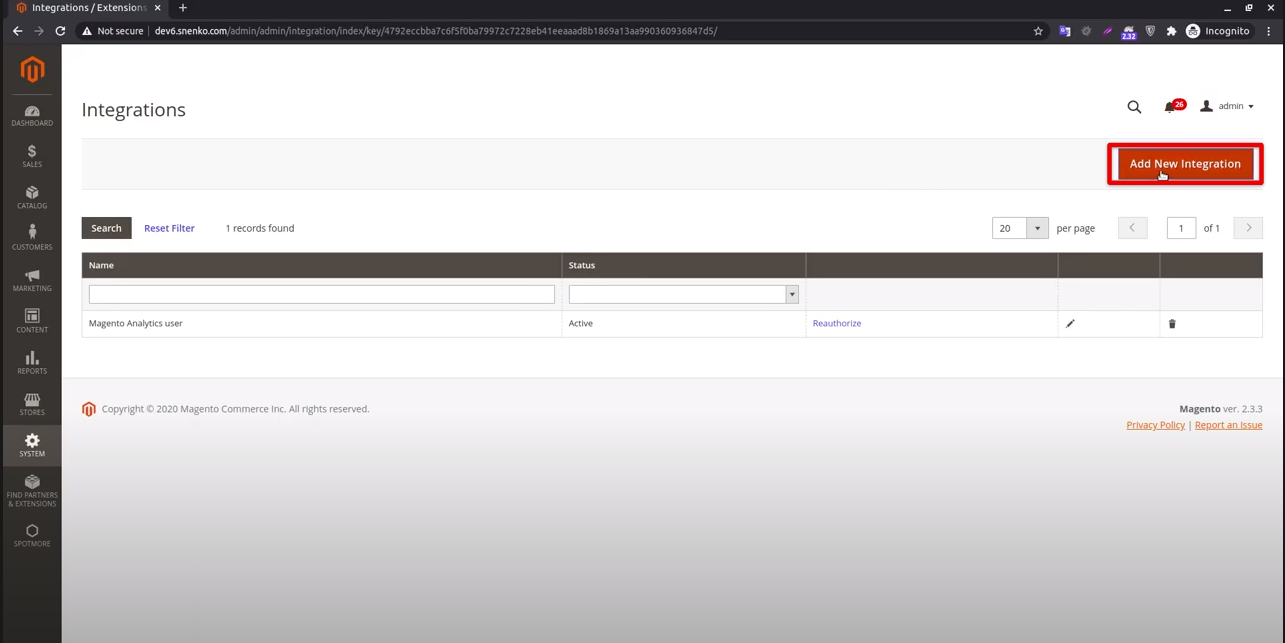
3. Select Add New Integration.
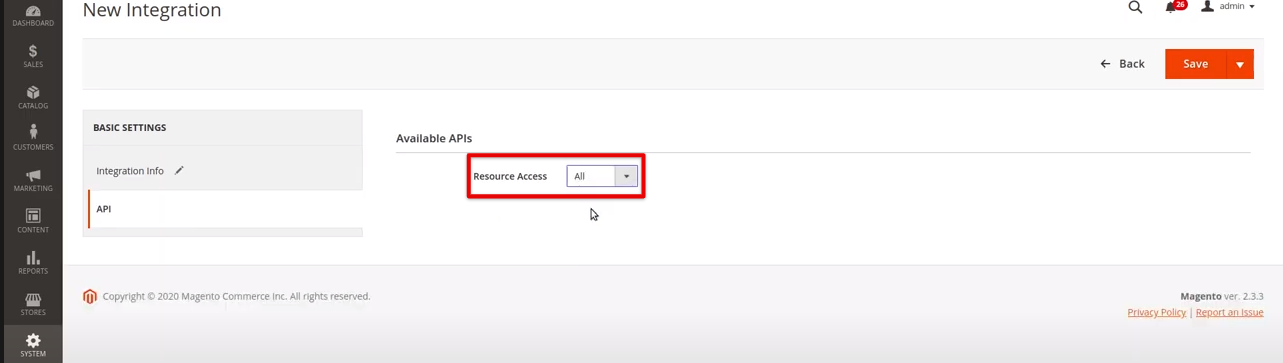
4. Name the new integration. The name field cannot be blank. Next, click on the API button.

4.1 On the Resource Access select All the default configuration is Custom.
4.2 Go back to the Integration info and re-enter the Admin password to validate changes. Click on Save.

5. You will see your integration name listed. The option Activate will be available, click on it.

6. Once you hit Activate. Click on the Allow button placed in the top right corner.

7. Integration tokens for extensions will be displayed. The Access Token is the one that will be needed for the Shipedge configuration side. After copying the Access Token you can click on Done.
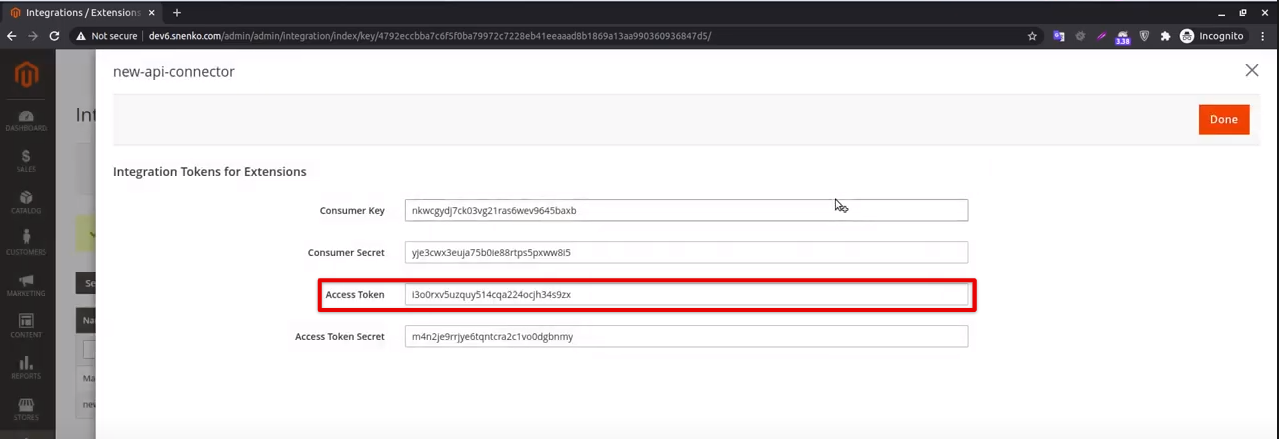
The Magento2 configuration is now completed.
Shipedge Channel Automation Setup Steps
1. In your OMS, navigate to your My Account -> Preferences section and click on the Channel Automation tab.

2. Look up the Magento2 Advanced integration. Click on it and name your Store then click on Add New Store.
An alert will be displayed, click on Ok.

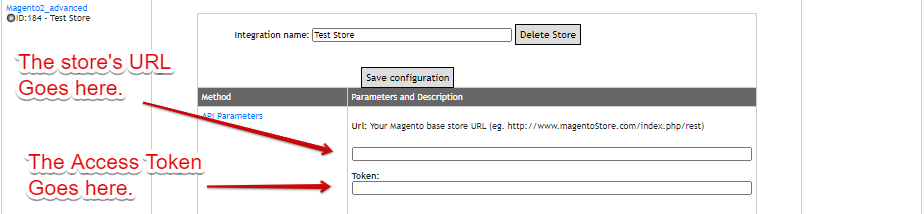
3. New options will be available. The API parameters section will require your store’s URL and the Access Token
The URL looks like this (eg. http://www.magentoStore.com/index.php/rest)
4. Order Status & Date are very important. You must specify what orders’ status will be pulled to Shipedge.
Also, set up the Date from which orders will be pulled.

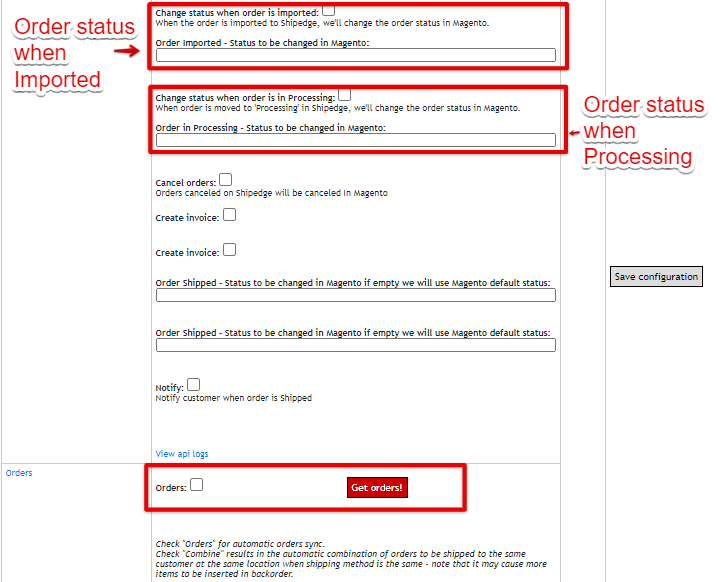
4.1 Customize orders.
• You can change the orders’ status when these are being pulled to Shipedge. If activated, if left blank it will be Magento default status.
• Also you can update orders status when these are being processed in Shipedge. If activated. if left blank it will be Magento default status.
• Orders can also be canceled (If orders are canceled in Shipedge it will reflect the change in Magento)
• Create an Invoice and set up a status to appear in Magento when orders are shipped in Shipedge.
• Notify customers when orders are shipped.
• Check orders and click on Get Orders!
You can configure this in the following section.
5. Update Tracking and Inventory.
5.1 In this section you must check the Update Tracking option.

5.2 Update Inventory.
****We highly suggest you do NOT check these two boxes in the Update Inventory section until your SKUs have been received into the Warehouse Management System. This will prevent any discrepancies in your inventory quantities on Magento.
6. SAVE your configuration.
Please make sure to save your configuration by clicking on the Save Configuration button placed above the
API Parameters section.

Congrats you are now set!