How to use the Xenvio Shipping Labels Mapper
Tabel of Contents
- What does it do?
- How is it set up?
- Where does my information show up?
What does it do?
Our Xenvio shipping labels mapper allows users to map Shipedge data fields to 3 spaces we’ve enabled on the shipping labels.
How is it set up?
- In your OMS navigate to Integrations.

- Navigate to and select the Xenvio Shipping Label mapper option at the top.

- From the pop up, select your desired Shipedge field(s) and connect it to one of the custom label tags from the Shipping labels fields on the right side.
*More than one Shipedge filed can be mapped to a single tag.
*The line goes from dotted to blue when it’s successfully connected to another field.

- Once all fields have been selected, it gets automatically saved in the system so you can just click Close.
 Note: Labels have limited space so some data may not appear on the label.
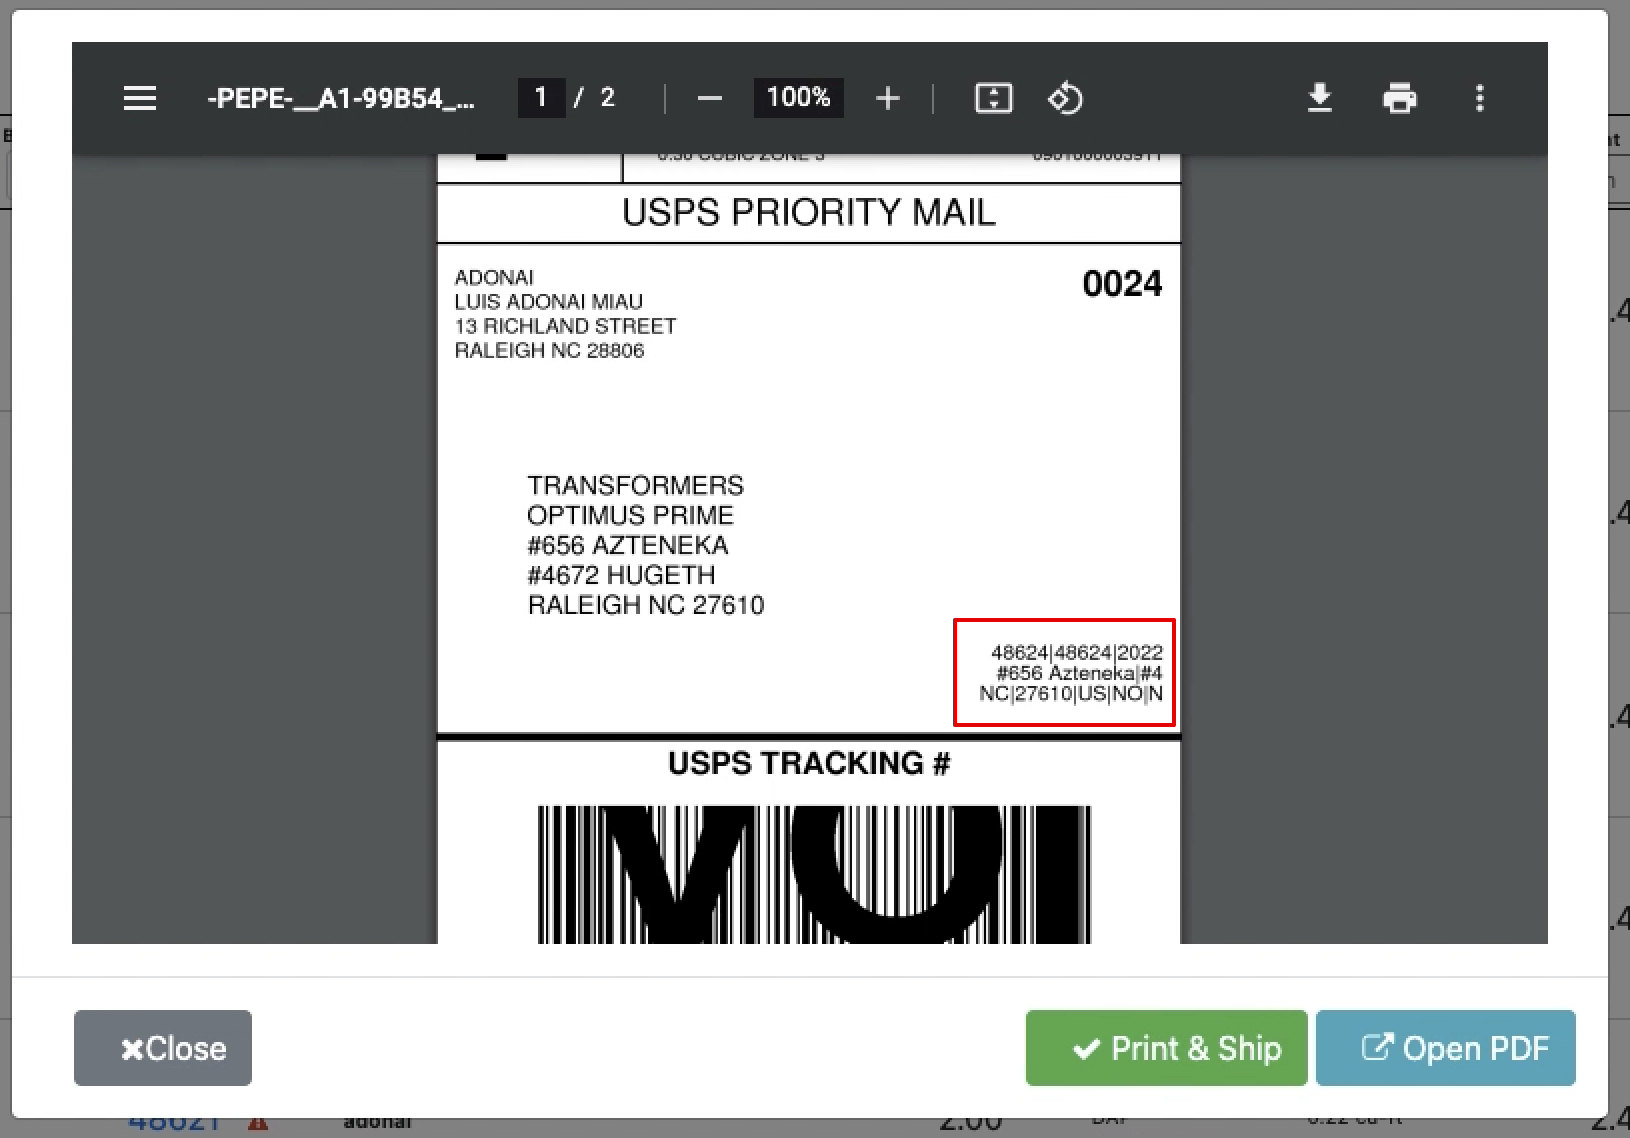
Where does my information show up?
When a label is generated your new tags will be located as shown in the image below: