How To Upload Inventory From A Spreadsheet Or CSV
How To Upload Inventory From A Spreadsheet Or CSV
You can create products in ShipEdge in several ways. You can upload SKUs manually, but one of the most common (and easier) ways is by uploading a spreadsheet in CSV format. CSV stands for “Comma Separated Values,” and it looks like this: “value”,” value”,” value”, etc.
We recommend using OpenOffice to create and edit this type of file. If you use Excel, you will need to save your file as a CSV (but make sure it’s the correct CSV format because there are plenty of them).
Go to Inventory > Import Products Screen

On the Home Screen, you will find the Inventory Menu-Item
1. Click on the Inventory menu item, then
2. Click on Import Products
Create a CSV file (download template provided)

Please read the documentation in this screen before filling in the data.
1. Click on the Download template icon
2. Open the file in your computer: We recommend using Open Office (free software) or Google Sheets to manage .csv. Excel in particular attempts to streamline some of the data by default in a way that can cause errors.
3. Populate the information following the instructions provided on the screen.
NOTE: Make sure to leave the header names in the file.

1) Note that one of the columns indicates the quantity you are sending the WMS. You will need to let us know how many units you are sending by filling in this column. If you are not sending the product yet and wish to go ahead and create an SKU on your inventory, just enter 0 quantity in this field.
2) Also, please note that the cost column (optional to fill out or not) should show the price of your supplier. If this box is filled, you will be able to generate Purchase Orders from ShipEdge. The information you enter inside this field is confidential and is only visible on your account.
Upload Your CSV File

After properly filling out your spreadsheet and saving it as a . CSV file, go back to ShipEdge in your browser.
1. Click the “Browse” button, and a finder or explorer window will pop up. Select the. CSV file you wish to import.
2. Click “Add” and wait a few seconds.
Results display after uploading your CSV File.

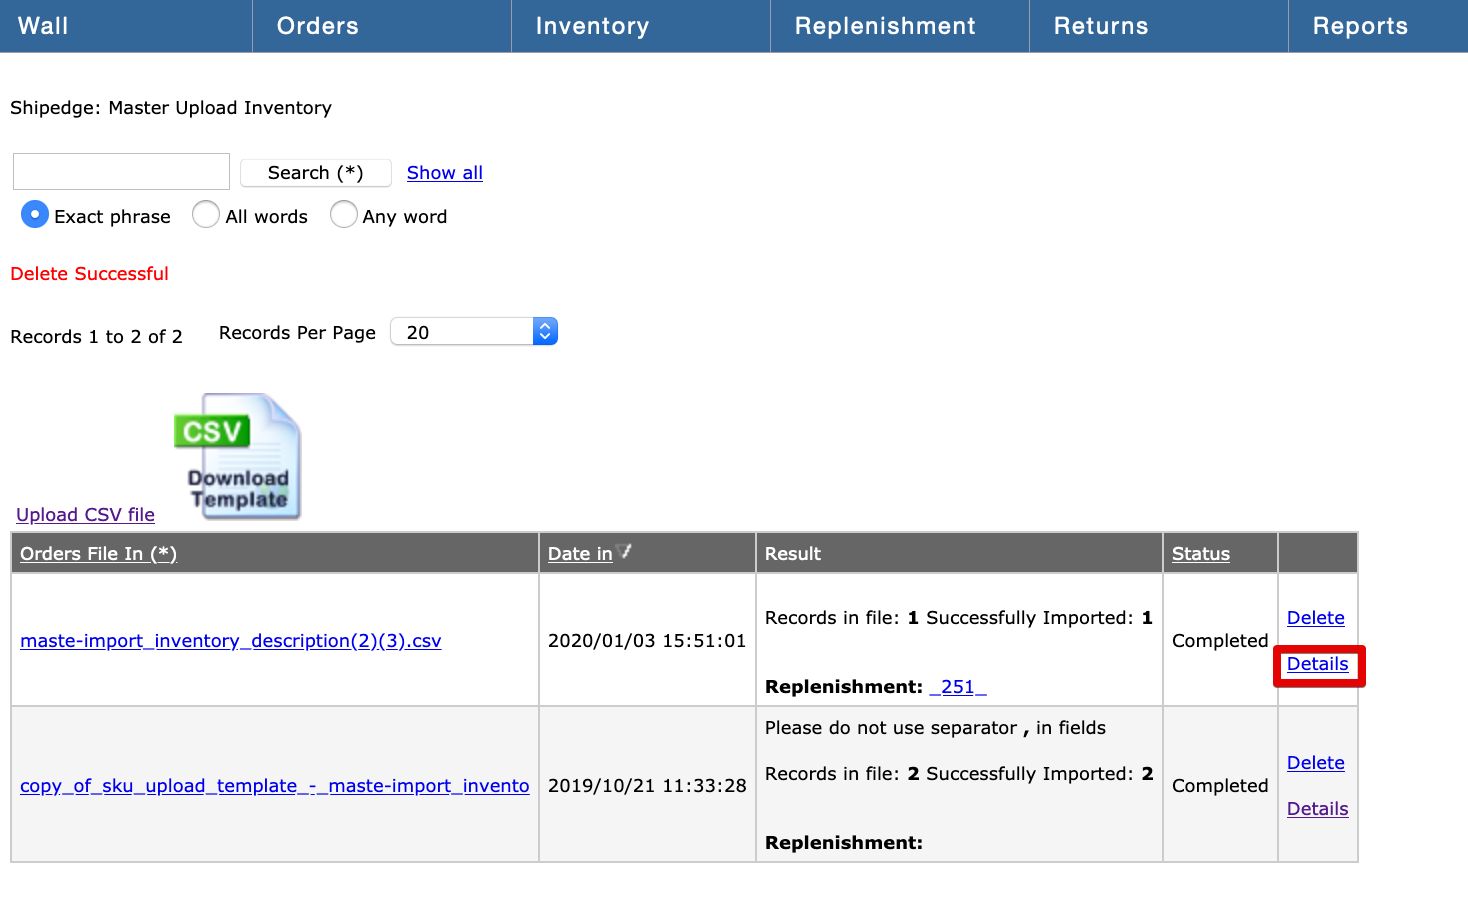
This view shows the list of all the CSV files you have uploaded.
RESULT:
Records in the file: How many lines of data were recognized from your file?
Successfully Imported: Number of SKUs that were created in ShipEdge.
Already in System: SKUs that will not be created because they already exist in ShipEdge.
SKUs not Imported below: Los of SKUs that do not meet requirements such as SKU, Description, Declared Value, etc.
IF EMPTY: If the results column is empty it means that the information in your file was not recognized.
If you need to see more information, simply click on “Details” to see a list of SKUs created or already in the system
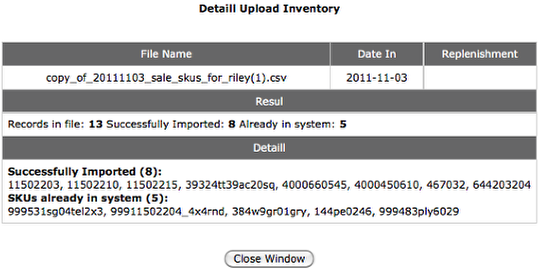
Detail Information After CSV Upload

This screen shows more detailed information, including a list of all the items imported or not.
Let Us Know What’s Coming

In order to let us know what’s coming you need to generate a PO or Replenishment in ShipEdge.
– If the quantity field is entered in the CSV file, ShipEdge will create a replenishment so you may review and submit it. Just click on the Replenishment ID#
Submitting a Replenishment

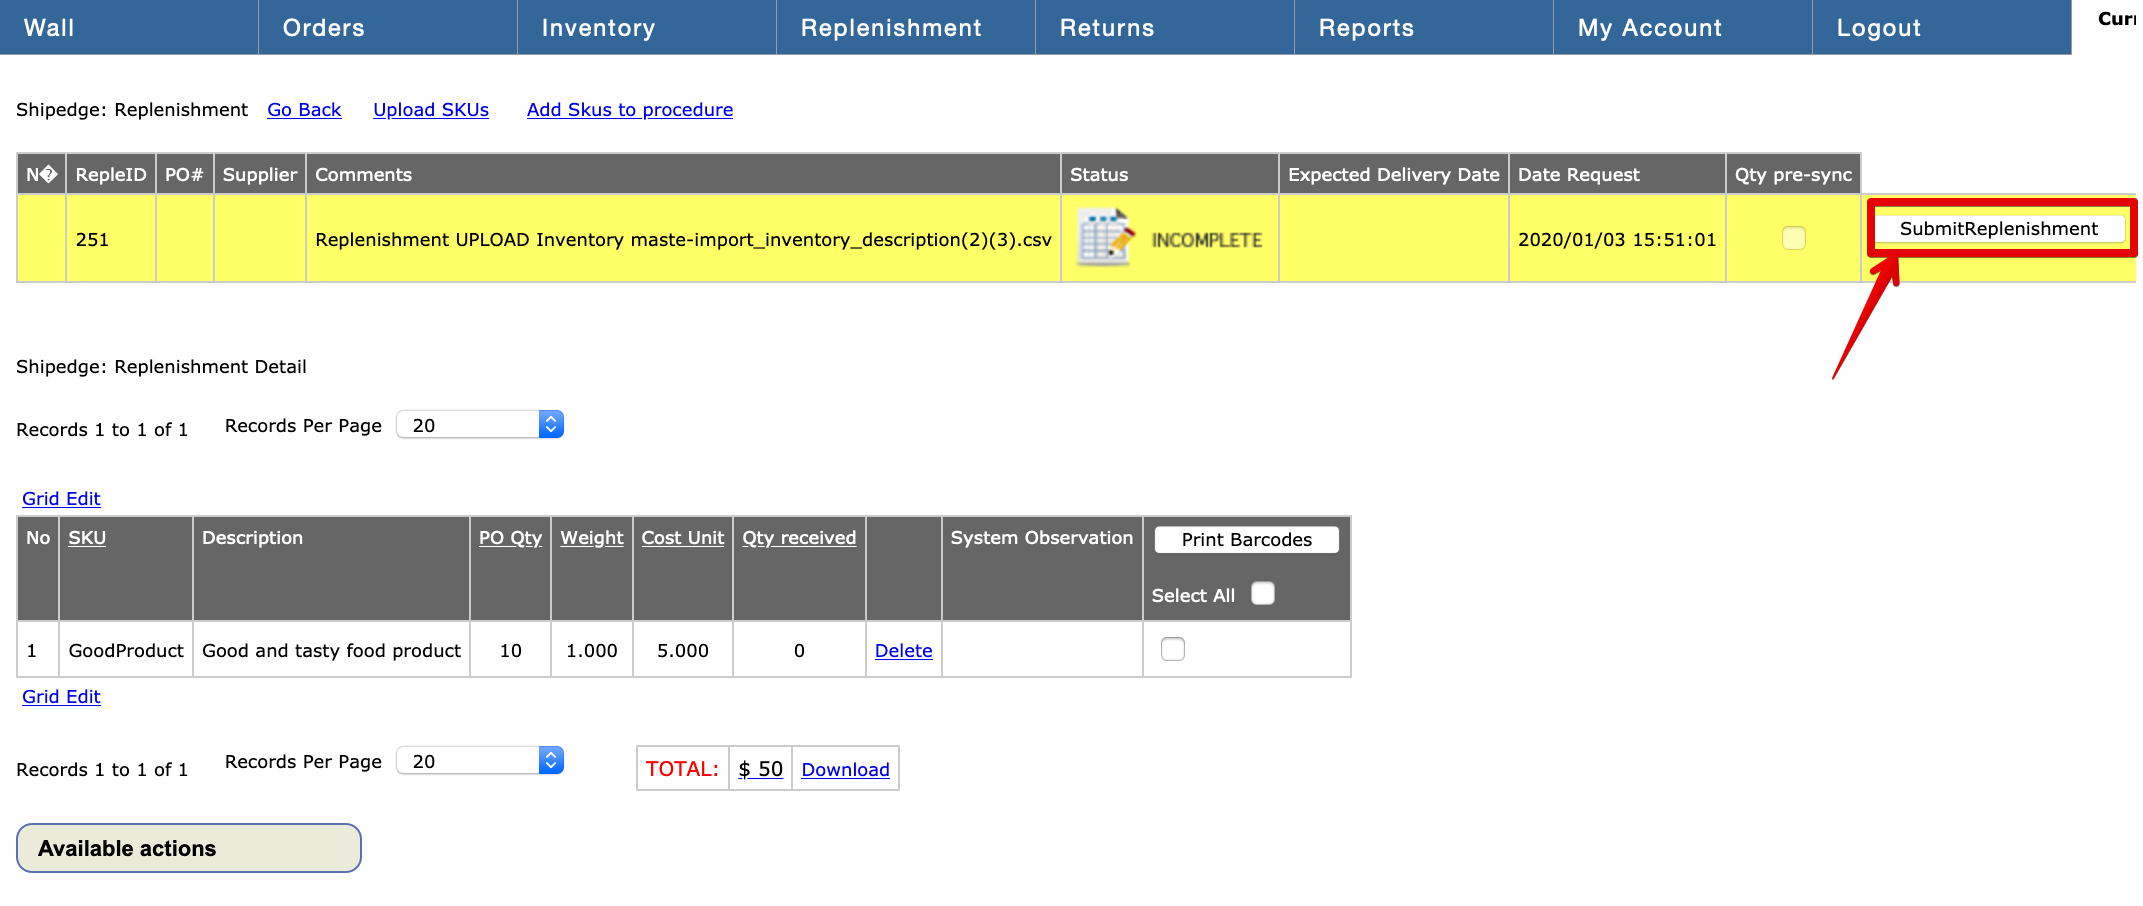
At this stage, your replenishment has been created, but it is not yet complete (i.e. not visible by the warehouse).
1. Verify all your data. If necessary you can still make changes by clicking on Grid Edit.
2. Notify the warehouse of this replenishment by clicking the “Submit Replenishment” button.
tip: You can download a purchase order to your supplier from this screen.
